

Alocasia Care Guide: Light, Watering & Healthy Growth
A new Alocasia leaf often begins as a narrow, tightly rolled spear. As it opens, the plant reveals the shape, texture and colour that make this genus so compelling: the soft, dark surface of ‘Black Velvet’, the metallic sheen of Alocasia cuprea, or the deeply divided leaves of a mature Alocasia portei. The genus includes compact windowsill plants as well as those that develop broad leaves and substantial upright stems.
Living with an Alocasia means noticing more than its spectacular leaves. You learn how quickly a pot dries as a new shoot develops, how young foliage changes as it matures, and when a fading older leaf is simply part of the plant’s growth. When a leaf suddenly droops or a fresh shoot appears beside the stem, those ordinary observations help you decide what to check next.
Need help with a sudden change? Check the urgent warning signs and safety advice.
1. Alocasia care at a glance
The essentials are simple: give your Alocasia bright, filtered light, keep it warm and check how quickly the mix dries between waterings. Start with the guide below, then adjust to the plant’s roots, size and position.
| Care need | A useful starting point |
|---|---|
| Light | Bright, filtered daylight; introduce stronger direct sun gradually and watch how the leaves respond. |
| Temperature | A comfortably warm room, protected from cold draughts, chilled windowsills and intense radiator heat. |
| Watering | In a standard draining pot, check below the surface and lift the pot. If the centre is still wet, wait. As the upper mix dries and the pot becomes lighter, water thoroughly and let excess drain. Adapt these checks to the mix and growing system. |
| Potting mix | A moisture-retentive mix with enough open spaces for air to reach the roots. |
| Humidity | Ordinary household conditions suit many plants; sensitive plants may benefit from a well-ventilated humid growing space. |
| Feeding | Use an appropriate complete fertiliser when roots are healthy and the plant is actively growing. |
| Handling | Keep Alocasia away from pets and children who might chew it; its tissues can cause painful irritation. |

Safety around people and pets
Alocasia tissues contain insoluble calcium oxalate crystals that can irritate skin and cause intense discomfort if chewed. Contact with the mouth may cause burning, drooling, swelling or difficulty swallowing. All ornamental Alocasia should be treated as unsuitable for eating. Keep plants, cut leaves, small propagules and discarded pieces containing plant tissue out of reach of children and pets. Wear gloves when cutting stems or dividing a plant, avoid touching your face or eyes while handling sap, and wash your hands and tools afterwards.
If someone chews part of the plant, remove any remaining pieces, gently wipe out the mouth and rinse and spit with water. A few small sips of water may help if the person is fully alert and can swallow normally; do not force fluids or induce vomiting. Contact a poison information centre or medical professional for advice, and be ready to identify the plant and the part involved. Difficulty breathing, severe mouth or throat swelling, or difficulty swallowing requires immediate emergency help (112 in the EU).
If sap enters an eye, immediately rinse with clean running water for at least 15 minutes and seek medical assessment if pain, redness or vision problems persist. Wash sap from the skin with soap and water.
If a pet chews Alocasia, contact a veterinarian promptly, even if the amount is uncertain. Do not try to make the animal vomit or give home treatments unless a veterinarian directs you. Drooling, repeated vomiting, swelling and breathing difficulties require urgent veterinary attention.

The first days with a new Alocasia
Choose a warm place with filtered light for a newly arrived plant. Take a moment to inspect the upper and lower surfaces of the leaves, the points where the leaf stalks meet the stem and the visible surface of the potting mix. Look for insects, webs, sticky residue, damaged stems and unusually soft tissue at the base. Where space allows, keep a new arrival apart from established houseplants for roughly a month, checking leaf undersides and stalk bases regularly. This observation period can reveal insects or young stages missed on the first inspection, though it cannot guarantee that a plant is pest-free.
Check whether the nursery pot has working drainage holes and how damp the mix feels below its surface. If the root ball is dry below the surface, water it thoroughly and let it drain. If it is already wet, empty any runoff and check again before watering. Empty any water collected in a decorative outer pot as well.
A healthy plant can usually remain in its nursery container while it adjusts. If the base begins to soften or several leaves collapse rapidly, inspect the stem and roots promptly; the steps for checking and recovering damaged tissue apply even to a recent arrival.
Shipping and the change from greenhouse to home can leave a new arrival briefly droopy or slow to grow. Keep it in a stable position and watch for leaves regaining firmness or a tightly rolled new spear gradually emerging. A single ageing leaf is often less worrying when the other leaves remain firm. Avoid repotting, feeding and spraying at the same time, since each can add stress and make it harder to tell what affected the plant.
2. Light and temperature: choosing a place
Many Alocasia grow beneath taller vegetation, where their broad leaves gather filtered daylight. In a home, a bright window can support sturdy new leaves, while a place far from a window may limit growth. The right place offers ample light without exposing foliage abruptly to intense sun.

Choosing a position with daylight
Check the daylight reaching the leaves throughout the day. An east-facing window often offers gentle morning sunlight, and a bright position near a south- or west-facing window can work well when a sheer curtain or a little distance softens strong afternoon rays. North-facing windows vary greatly with the building, season and surrounding shade; plants placed deeper inside the room receive much less light than those close to the glass. Glass, nearby buildings, overhanging trees and the height of the sun can change the exposure considerably.
Leaves give useful clues about light. Growth that leans steadily toward the window, unusually long leaf stalks or several new leaves that each grow smaller than the last may suggest the position is too dim. Turning the pot occasionally can help even out a lean. If new leaves keep getting smaller, check how much light reaches the plant. Temperature, a recent move and root health also affect growth, so consider all three before moving the plant again.
An Alocasia accustomed to filtered light can sometimes grow with direct sun, but introduce stronger exposure gradually. Notice when and how long the rays reach its leaves, especially after moving the pot closer to glass. Pale bleached areas or dry scorched patches after a move are signs of excessive exposure. Those patches will remain; the next leaves are a better way to judge how well the plant has adjusted.
New leaves reveal how an Alocasia is adjusting to a new light position. The light available while a leaf develops can affect its structure. In studies of Alocasia macrorrhizos, leaves produced in brighter light were thicker and capable of higher photosynthetic activity than those grown in deep shade. Older leaves keep much of the structure they formed earlier, and existing scorch marks remain. Allow time for fresh foliage to develop before judging the move.
On variegated plants, the green portions of a leaf do much of the photosynthetic work; extensive pale areas may scorch more readily in intense sun. With velvet or metallic foliage, use new growth and signs of stress to judge a suitable position, since leaf colour and texture cannot establish a precise light requirement.
Using artificial light
A grow light can help when daylight is limited or shelves are far from a window. Choose one that reaches leaves across the whole plant, and follow the manufacturer's guidance on hanging distance and daily use. A broad upper leaf may sit directly beneath the lamp while a new leaf opening below gets far less light. Check plants at the edges of the beam too.
A timer helps keep the daily light-and-dark cycle consistent. White horticultural LEDs can work well. Kelvin describes the colour of their light; if you measure PPFD (light available for photosynthesis), check it where the leaves sit, including those shaded by larger blades. As the plant grows closer to the lamp, watch for signs of scorch or heat stress.
Keeping the plant comfortably warm
Warmth helps many commonly grown Alocasia stay active. Around 18–28 °C is a useful starting range, although the best conditions differ among species and cultivars. While plants are growing, prolonged temperatures below roughly 16 °C can stress the plant, especially when the root ball is wet; sensitive cultivars may be affected sooner. Sudden chilling and repeated cold draughts can reduce growth and water uptake. A pot resting against cold glass or on a stone sill may become cooler than the surrounding room.
Keep the foliage away from air-conditioning blasts and draughty doors. Direct radiator heat can increase water loss and leave the air around leaves very dry. In particularly hot weather, look for leaves overheating behind glass and check the substrate more often. The same pot that dries quickly in warm, bright conditions may remain damp far longer when its room becomes cooler or the daylight fades. That is why its watering needs should be judged from the pot and plant, not from a date on the calendar.
3. Watering Alocasia: judging moisture and watering thoroughly
Each Alocasia pot dries at its own pace. In an ordinary draining pot, check the moisture around the roots and water before the root ball dries hard. The mix can retain moisture while still letting air reach the roots. A managed growing system may stay evenly moist for longer if its root zone remains well aerated. Prolonged saturation and repeated severe drying can both disrupt growth.
Checking moisture before watering
Feel the upper mix, then check farther into a deep pot or one that dries unevenly. Insert a clean wooden skewer carefully away from the stem to check the centre. If the centre is plainly wet and the pot still feels heavy, wait. In a standard draining pot, a drying upper layer, a slightly moist centre and a noticeably lighter pot may mean it is time to water. The mix, root volume and growing conditions affect how those cues should be interpreted.
Lift the pot just after watering and again as it dries; the change in weight becomes easier to recognise with practice. Combine that clue with what you find in the mix. Bark can hold moisture without clinging to a skewer, and a compact nursery core can stay damp after the surrounding material feels dry. Check several spots if drying seems uneven. A probe-style moisture meter can help, but readings vary with the substrate and dissolved salts, so confirm them against the pot's weight and the feel of the mix.
For a normal pot with drainage holes, pour water slowly over several areas of the surface so the root ball is moistened throughout and excess begins to run out. Small splashes that wet only the top of the pot may leave the central roots dry. Pause between pours so dry parts of the mix have time to absorb the water, then let the container drain. Empty the saucer or decorative pot afterwards. Use water at roughly room temperature; very cold water can chill the roots.
Water in the saucer does not always mean the root ball has been soaked. If it runs straight down the side of the pot, the centre may still be dry. Some peat-based or bark-rich media repel water after drying hard. Add water slowly in several passes, or briefly stand the inner pot in water so the root ball can rewet, then allow it to drain fully. A skewer check can tell you whether moisture has actually reached the middle. If water keeps bypassing the centre or the mix dries unevenly, check whether it needs replacing when you repot.
For more on moisture checks and watering technique across houseplants, see our houseplant watering guide.
Changing the routine as conditions change
Leaf area, fresh growth, light, warmth, moving air and root volume all affect water use. Notice how quickly the pot becomes lighter while new foliage is expanding. After leaf loss, root damage, repotting or a move farther from the window, the same mix may stay damp much longer. Recheck moisture whenever growth or the surroundings change noticeably.

When a leaf droops, check the root ball before deciding on water. Dry mix throughout may need thorough rewetting. Wet mix accompanied by continuing collapse points toward impaired roots, chilling or another problem that needs investigation. A single limp older leaf with firm new growth can be monitored; several leaves suddenly drooping or collapsing call for a prompt check of the mix and stem, followed by root inspection when the signs warrant it.
An Alocasia with no leaves usually uses much less water. If it lost its foliage after stress but still has living roots, check the mix before watering and keep the root zone from staying soggy or drying hard. Species with a documented seasonal rest may need different care, as explained under slower growth or dormancy. A firm base and living buds are encouraging signs; the pot may start drying faster once a new shoot grows.
Bottom watering and managed irrigation
Bottom watering can be a convenient way to moisten a pot through its drainage holes, especially when the surface is difficult to wet evenly. Place the inner pot in a shallow container of water and allow moisture to rise through the drainage holes. Check that the root ball has become moist—using pot weight or a careful moisture check—then remove the pot and let it drain fully. Do not leave a standard nursery pot standing in its tray between waterings. Where bottom watering is the regular method, occasional watering from above can help wash accumulating soluble fertiliser salts out of a freely draining medium.
A managed subirrigation system can maintain moisture more evenly than an ordinary draining pot. Tests with Alocasia ‘Bambino’ found that consistently moist, subirrigated plants produced more leaves and greater plant mass than plants given the drier treatments in that study. The result shows why repeated severe drying can restrict growth in that cultivar and system. At home, check the moisture and aeration in the growing system you use, and let an ordinary nursery pot drain fully after watering.
4. Potting mixes, containers and when to repot
An Alocasia’s roots need moisture and air at the same time. Coarser pieces in a potting mix leave spaces for water to drain and air to reach the roots; finer materials help hold moisture. The right balance depends on the pot and how quickly the plant uses water.
What a potting mix needs to do
Begin with a moisture-retentive houseplant mix and add bark, perlite or pumice if the roots need more open space. A ready-made aroid mix can also work. Check how quickly the finished mix dries in its pot. A small root ball in a very coarse mix may dry quickly; a vigorous plant may do well in a finer mix that still drains freely. Pot size, warmth and light all affect drying time. After watering, excess should drain away, leaving moisture and air available to the roots.
If a mix dries too fast, coir and other fine organic components can help it hold and distribute moisture; peat can also work well in a structured nursery medium. When a mix packs down or stays wet too long, larger pieces of bark or coconut husk chips can keep more spaces open. Perlite, pumice and lava rock add mineral particles with different weights and pore spaces. Fine material can fill the gaps between larger pieces, leaving the finished mix denser than it looks.
Sphagnum is useful for some small propagules and temporary rooting because it can hold moisture close to developing roots; loosely packed moss needs careful monitoring so it stays airy. Zeolite can influence the mix's structure and retain some dissolved nutrients. Both ingredients are optional. If you use either, check how quickly the mix dries and whether water still drains through it freely.
Even a mix that worked well at first can change after months in the pot. Water may start running around a hard, dry centre, or the container may stay sodden despite adequate warmth and light. The material can settle into a dense mass, and roots may eventually occupy nearly all the available space. These are reasons to check the medium and root ball when deciding whether to repot.
For a closer look at ingredients and how to combine them, see our aroid substrate guide.
Pots, drainage and plant structure
Once the mix is suitable, choose a pot that fits the healthy root ball with a little room for new roots. A much larger pot can hold more damp mix than the plant can use, while a severely cramped container may dry unexpectedly fast. Depth matters as well as width, particularly for smaller root systems. Tall plants with broad leaves can become top-heavy; a heavier outer pot or stable stand can provide support without adding an excessive volume of planting medium.
Choose a pot with drainage holes so you can wet the whole root ball and let excess water escape. Empty any runoff from a decorative outer container. A gravel or mineral layer at the bottom takes up space that roots could occupy and cannot replace drainage holes or prevent root rot. Its depth and materials can also affect how much water stays in the pot.
With the pot ready, look for the growing points on the Alocasia stem before filling around the roots. New leaves emerge from these points; a tightly rolled spear may already be visible while much of the stem remains hidden among leaves and substrate. Some species form an upright stem, and others carry thickened storage tissue near or below the surface. Short runners called stolons may produce additional shoots.
Roots absorb water and minerals, and living buds on the stem can produce new shoots. Protect both while lifting and positioning the plant. You may also find small storage structures among the roots; handle them gently. Their role in making new plants is explained under propagating small Alocasia structures.

Set the Alocasia so its healthy roots are covered and the plant stands firmly. If it grew well at its previous planting depth, use that level as a guide. Some healthy, rooted stem tissue may need a little mix around it for support, but keep leaf stalk bases and damaged stem tissue clear of persistently damp mix.
If the medium settles substantially after watering, check the level again. Repeatedly topping up a pot can gradually bury stem tissue that was once exposed. Most upright Alocasia do not need a climbing pole, though a large plant may need temporary physical support while its stem strengthens.
Knowing when and how to repot
A newly purchased Alocasia may grow well in its nursery container for some time; nursery mixes are designed for commercial growing and can remain serviceable at home. Consider repotting when the medium has broken down, is difficult to rewet or drains badly, or when the plant genuinely needs more root space. One root through a drainage hole tells you little on its own. A densely circling root mass, a pot that now dries unusually fast despite thorough watering, or a top-heavy plant with roots filling the container are stronger reasons. For a routine repot, choose only a modest increase in size.
A compact nursery plug can remain inside the root ball even when the surrounding mix is loose. It matters if the plug stays much wetter or drier than everything around it, making ordinary moisture checks misleading. During an otherwise justified repot, loosen it gently where possible. A firmly rooted, healthy plant may be damaged by washing every particle away, so preserve sound roots and avoid turning a routine move into an unnecessary bare-root operation.

For a routine repot, prepare a clean container sized to the root mass and a suitable, evenly moist mix. Support the root ball as you slide it out. Ease apart only what needs adjusting, keep the plant at an appropriate depth and fill gently around the roots. Water to settle the mix, let excess drain and put the plant back in a warm, bright position away from harsh sun.
After repotting, check moisture in both the old root ball and the fresh mix. New material by the pot wall may feel dry while a compact nursery core stays wet, so judge watering by the centre too. A few leaves may droop briefly when repotting disturbs the roots; if the stem stays firm, watch for the leaves to recover as the plant settles. If repotting was necessary because of active rot, follow the more cautious root and stem recovery guidance instead.
An Alocasia usually handles repotting well when its roots are healthy and it is actively growing. A firm plant in a slower growth phase can often stay undisturbed. Rapid collapse, a foul smell or soft, decaying tissue calls for prompt root and stem inspection, followed by removal of tissue that is genuinely rotten. Healthy roots vary in colour and texture, so preserve those that are intact and resilient, including firm tan roots.
Growing in LECA and passive reservoirs
In a passive reservoir setup, water sits below the plant and gradually moves into the growing medium. Expanded clay (LECA) can hold the Alocasia upright while drawing moisture from the reservoir. Check the water level regularly and use a suitable complete fertiliser, since LECA contributes few nutrients on its own. Roots still need air, and vulnerable stem tissue must stay clear of cold, stagnant water. This is an optional way of growing Alocasia, with its own routine.
Moving an Alocasia from ordinary potting mix into LECA or another low-nutrient medium may pause growth while the roots adapt. Choose a healthy, actively growing plant for a planned transition; one losing roots or recovering from shipping should be allowed to recover first. Gently remove old mix that could remain as a wet clump around the roots, while preserving healthy roots whenever possible.
Once the plant is in the new setup, use the water level specified for that reservoir and medium. A fill level copied from another system may leave roots too wet or too dry. Keep vulnerable stem tissue above standing reservoir water, and watch visible roots and new leaves for changes. LECA contributes few nutrients, so prepare the solution according to the guidance for feeding and water quality and the fertiliser supplied for that system.
5. Humidity and air movement
A new Alocasia leaf may stick as it opens or develop dry edges before it has fully unfolded. Humid air can help delicate foliage open, while warmth, gentle airflow and water uptake by healthy roots also matter. Check these conditions together before increasing humidity.
Humidity at home
An Alocasia can grow well in a comfortable living room when its roots have suitable moisture and air and its leaves receive enough light. Newly established plants and some sensitive selections may open leaves more smoothly in a ventilated, humid growing space. Velvet or metallic foliage does not indicate a precise humidity requirement.
Very dry air may accelerate water loss and make young leaves harder to open, especially near heating and cooling outlets. Crisp edges can also develop after uneven watering, root problems, mineral accumulation, excessive light, pest activity or ageing. Check the youngest leaves and the root ball together before adjusting the room's humidity.
If new leaves open smoothly and their edges stay healthy, the plant may already have enough humidity. A hygrometer can show how humidity rises and falls during the day, helping you recognise a very dry spot or an enclosure that stays damp. Let the plant's response guide whether additional humidity would be useful.
Watch for condensation lingering on cold windows, damp furniture or mould when raising room humidity. German environmental guidance suggests roughly 40–60% relative humidity as a general household range that helps limit mould risk. These figures concern the room, especially cold walls and windows; they do not set a particular Alocasia's ideal humidity. A ventilated cabinet can provide a separate growing space for a humidity-sensitive plant.
Humidifiers, cabinets and misting
A suitable humidifier can raise moisture around a group of plants. Place it so that walls, furniture and the leaves themselves do not stay damp, and measure humidity nearby. For portable models, empty and replace tank water regularly—ideally daily—and clean the unit as its manufacturer directs. Neglected reservoirs can disperse microbes or fine mineral deposits into indoor air, especially with ultrasonic models.
A growing cabinet offers more control, especially for recently rooted or humidity-sensitive plants. Leave room for an unfurling leaf to open fully, watch for condensation lingering on the panels, and provide gentle air exchange or circulation. Foliage that remains wet for long periods in a crowded enclosure can create favourable conditions for some leaf diseases. Keep the air moving gently without blowing a strong stream from a fan directly across the leaves.
Misting briefly wets the leaves but generally does little to maintain room humidity. Grouping plants or placing a pot above a pebble tray may have a small local effect; the base of the inner pot should stay out of standing water. Velvet leaves can mark when repeatedly wetted or rubbed, so choose the gentlest approach for the foliage you have. Leave newly developing foliage to expand in stable conditions; unnecessary rubbing or repeated wetting can damage delicate surfaces.
6. Feeding and water quality
An Alocasia uses nutrients as it grows new leaves and roots. Healthy, actively growing plants may benefit from feeding; how much extra fertiliser they need depends partly on what the potting mix already contains.
Feeding healthy active growth
Choose a complete fertiliser intended for houseplants, including trace elements. Follow its label for dilution and frequency in your growing medium; a concentrated product and a ready-to-use liquid require different handling. Some nursery mixes already contain fertiliser, so check the product or nursery information before adding more. Other media depend on nutrients supplied with watering. During strong growth, regular modest applications can maintain supply. When growth slows markedly or a plant has substantial root damage, reduce or pause feeding until conditions and root function improve.
Excess dissolved fertiliser can stress roots and slow growth. In a nutrition trial with Alocasia ‘Bambino’, plants grew best with a moderate nutrient concentration; higher concentrations reduced growth. Watch how new leaves develop and whether mineral deposits collect around the pot.
Yellowing leaves often raise questions about feeding. An older leaf that slowly turns yellow while healthy new leaves grow may be showing normal ageing. If several leaves are yellowing and the roots are weak, check moisture, light, cold exposure and pests. Additional dissolved salts from fertiliser can stress damaged roots, so make those checks before feeding.
Mineral buildup and water choice
Tap water suits many Alocasia, but its dissolved mineral content varies by location. Those minerals enter the pot each time you water. A household softener that replaces calcium and magnesium with sodium can cause sodium to build up in the mix. If your tap water is softened that way, use an unsoftened tap, suitably collected rainwater or another appropriate water source for regular watering.
Fertiliser adds dissolved salts too. When little water drains from a pot, those salts and minerals from the water can build up. A pale crust on the surface or rim may indicate deposits, although its colour cannot identify which minerals are present.
In a freely draining pot, occasional thorough watering from above can carry some accumulated dissolved salts out through the drainage holes. Allow the pot to drain completely afterwards. If deposits keep returning or the local tap water contains substantial dissolved minerals, clean rainwater or properly prepared reverse-osmosis water may be useful. Both are low in minerals, so a suitable complete fertiliser may still need to supply calcium, magnesium and other nutrients. A brown leaf tip on its own is a poor reason to buy a filtration system.
Letting tap water stand overnight may reduce some free chlorine, but it will not reliably remove chloramine or dissolved hardness minerals. Some suppliers use chloramine because it remains in treated water longer. If leaf margins brown, check the other symptoms and root conditions before blaming a water disinfectant. A brown leaf edge alone cannot tell you what caused it.
Reservoir-grown Alocasia need a different feeding routine. LECA and other largely inert media contribute few essential nutrients, so the nutrient solution must provide the required elements, including calcium, magnesium and nutrients needed in smaller quantities. Use a complete fertiliser intended for the growing system and refresh the reservoir as instructed. Watch for mineral deposits and changes in growth.
Experienced growers may measure solution strength (the concentration of dissolved nutrients) and pH (how acidic or alkaline the solution is). Interpret those readings according to the fertiliser, water source and measuring method; continued development of healthy new leaves is also encouraging.
7. Healthy Alocasia growth: leaves, resting and flowering
An Alocasia’s newest leaves offer a useful record of how it is growing. A new blade can open as a soft, pale shape before its colour deepens and the surface takes on the texture you recognise from mature foliage. On some species the young leaves are coppery or purple-toned; on others the ribs and veins become more prominent with age. Watching that progression gives you a reference for the plant’s normal appearance, growth rate and changes over time.
Watching new leaves and old leaves
A newly opening leaf may look wrinkled, folded or thin before it firms up. Let the blade unfold naturally; pulling its delicate edges can tear expanding tissue. If a fold stays trapped, check for excessively dry air or mix, abrupt changes in light or temperature, or pests around the folded tissue without prising it apart. Watch the next leaf for a similar problem. Repeated trapping, severe distortion or feeding marks warrant closer symptom and pest checks.
As an Alocasia becomes established, it may produce larger, differently shaped foliage, longer stalks or additional shoots. Leaf size reflects age and genetic characteristics as well as growing conditions. A temporarily smaller leaf after repotting or a change of position can be part of adjustment. If several successive new leaves are getting smaller, the stalks are weaker or fresh foliage dies sooner than it used to, look more closely at light, roots, nutrients and pests. These changes reveal more about the plant than a single unusually small leaf.
An older, lower leaf will eventually fade, yellow and dry, sometimes as another leaf opens nearby. On a small plant carrying only a few leaves, the loss can look dramatic. Leaf turnover varies: some Alocasia keep several older leaves while making new ones. Notice whether the remaining leaves stay firm and each new blade develops well. Several leaves declining together or a continuing reduction in leaf size deserves a closer look at the roots and growing conditions.
Small droplets sometimes collect at the tips or edges of otherwise healthy Alocasia leaves. This can be guttation: the plant releases droplets through tiny structures along the leaf edges, often when its roots are taking up water but little moisture is evaporating from the leaves. Condensation or spray droplets can look similar. A little clear liquid on an otherwise healthy leaf is different from tissue that is becoming watery, dark and soft. Keep the plant away from children and pets who might put it in their mouths, and do not taste or drink the droplets.
Slower growth, leaf loss and true dormancy
A plant that was steadily opening new leaves may pause after shipping, repotting or a move. Cooler rooms and reduced daylight can also slow it down. During a pause, it may still hold healthy leaves and firm living stem tissue. Growth uses less water at this stage, so reassess the pot's moisture each time you consider watering.
Some Alocasia species have a genuine seasonal rest and may regularly lose all their leaves. Others can keep their leaves under suitable conditions. A leafless period may therefore be normal for a correctly identified, naturally dormant species, while an evergreen Alocasia can also shed its leaves after severe stress. If you are unsure whether your Alocasia normally rests, check its identification and consider whether chilling, persistently wet mix or another sudden change preceded the leaf loss. A date on the calendar is no reason to force a healthy plant into dormancy: with enough warmth and light indoors, it may keep growing.
A leafless Alocasia may still have living stem tissue, buds and roots capable of producing a new shoot. Without leaves taking up water, its pot may stay damp much longer than before. After stress-related leaf loss, keep the plant in a comfortably warm, stable place and adjust watering to the mix and surviving roots, avoiding prolonged sogginess or hard drying of living roots. For a species known to rest naturally, follow care guidance for that species and check that its storage stem stays firm. Avoid repeatedly unpotting the plant, and watch for a firm base or a swelling bud.

Softening or disintegration at the base is a different signal, even in a species that naturally rests. Follow the root and stem recovery guidance if that happens.
Caring for the leaves you have
Alocasia foliage collects dust, just like furniture and windows. For sturdy, smooth leaves, gently lift away loose dust with a soft, slightly damp cloth while supporting the blade. Velvety leaves, including those of ‘Black Velvet’, are easily marked by rubbing; a soft dry brush or careful dusting is often gentler. Avoid abrasive cleaning, indiscriminate leaf-shine products and forceful wiping of new leaves. An Alocasia with a few blemishes can still photosynthesise through the healthy green portions of those leaves.
A completely spent leaf can be removed once it has yellowed and dried, if it does not fall away naturally. Use a clean, sharp tool if a cut is needed and protect the central growing point and nearby young leaves. Wear gloves when cutting the leaf and keep discarded foliage away from children and pets. Damaged but substantially green leaves may still support a recovering plant through photosynthesis. If foliage shows active disease, use suitable hygiene precautions when removing it and check for spreading lesions.
Small shoots and the unusual Alocasia inflorescence
A second small spear emerging beside the main stem may be an offset beginning to grow. Left in place, an offset can develop leaves and roots and make the pot look fuller. Allowing a small shoot to establish is often more rewarding than separating it immediately; a rooted offset can also become a new plant when you are ready to propagate.
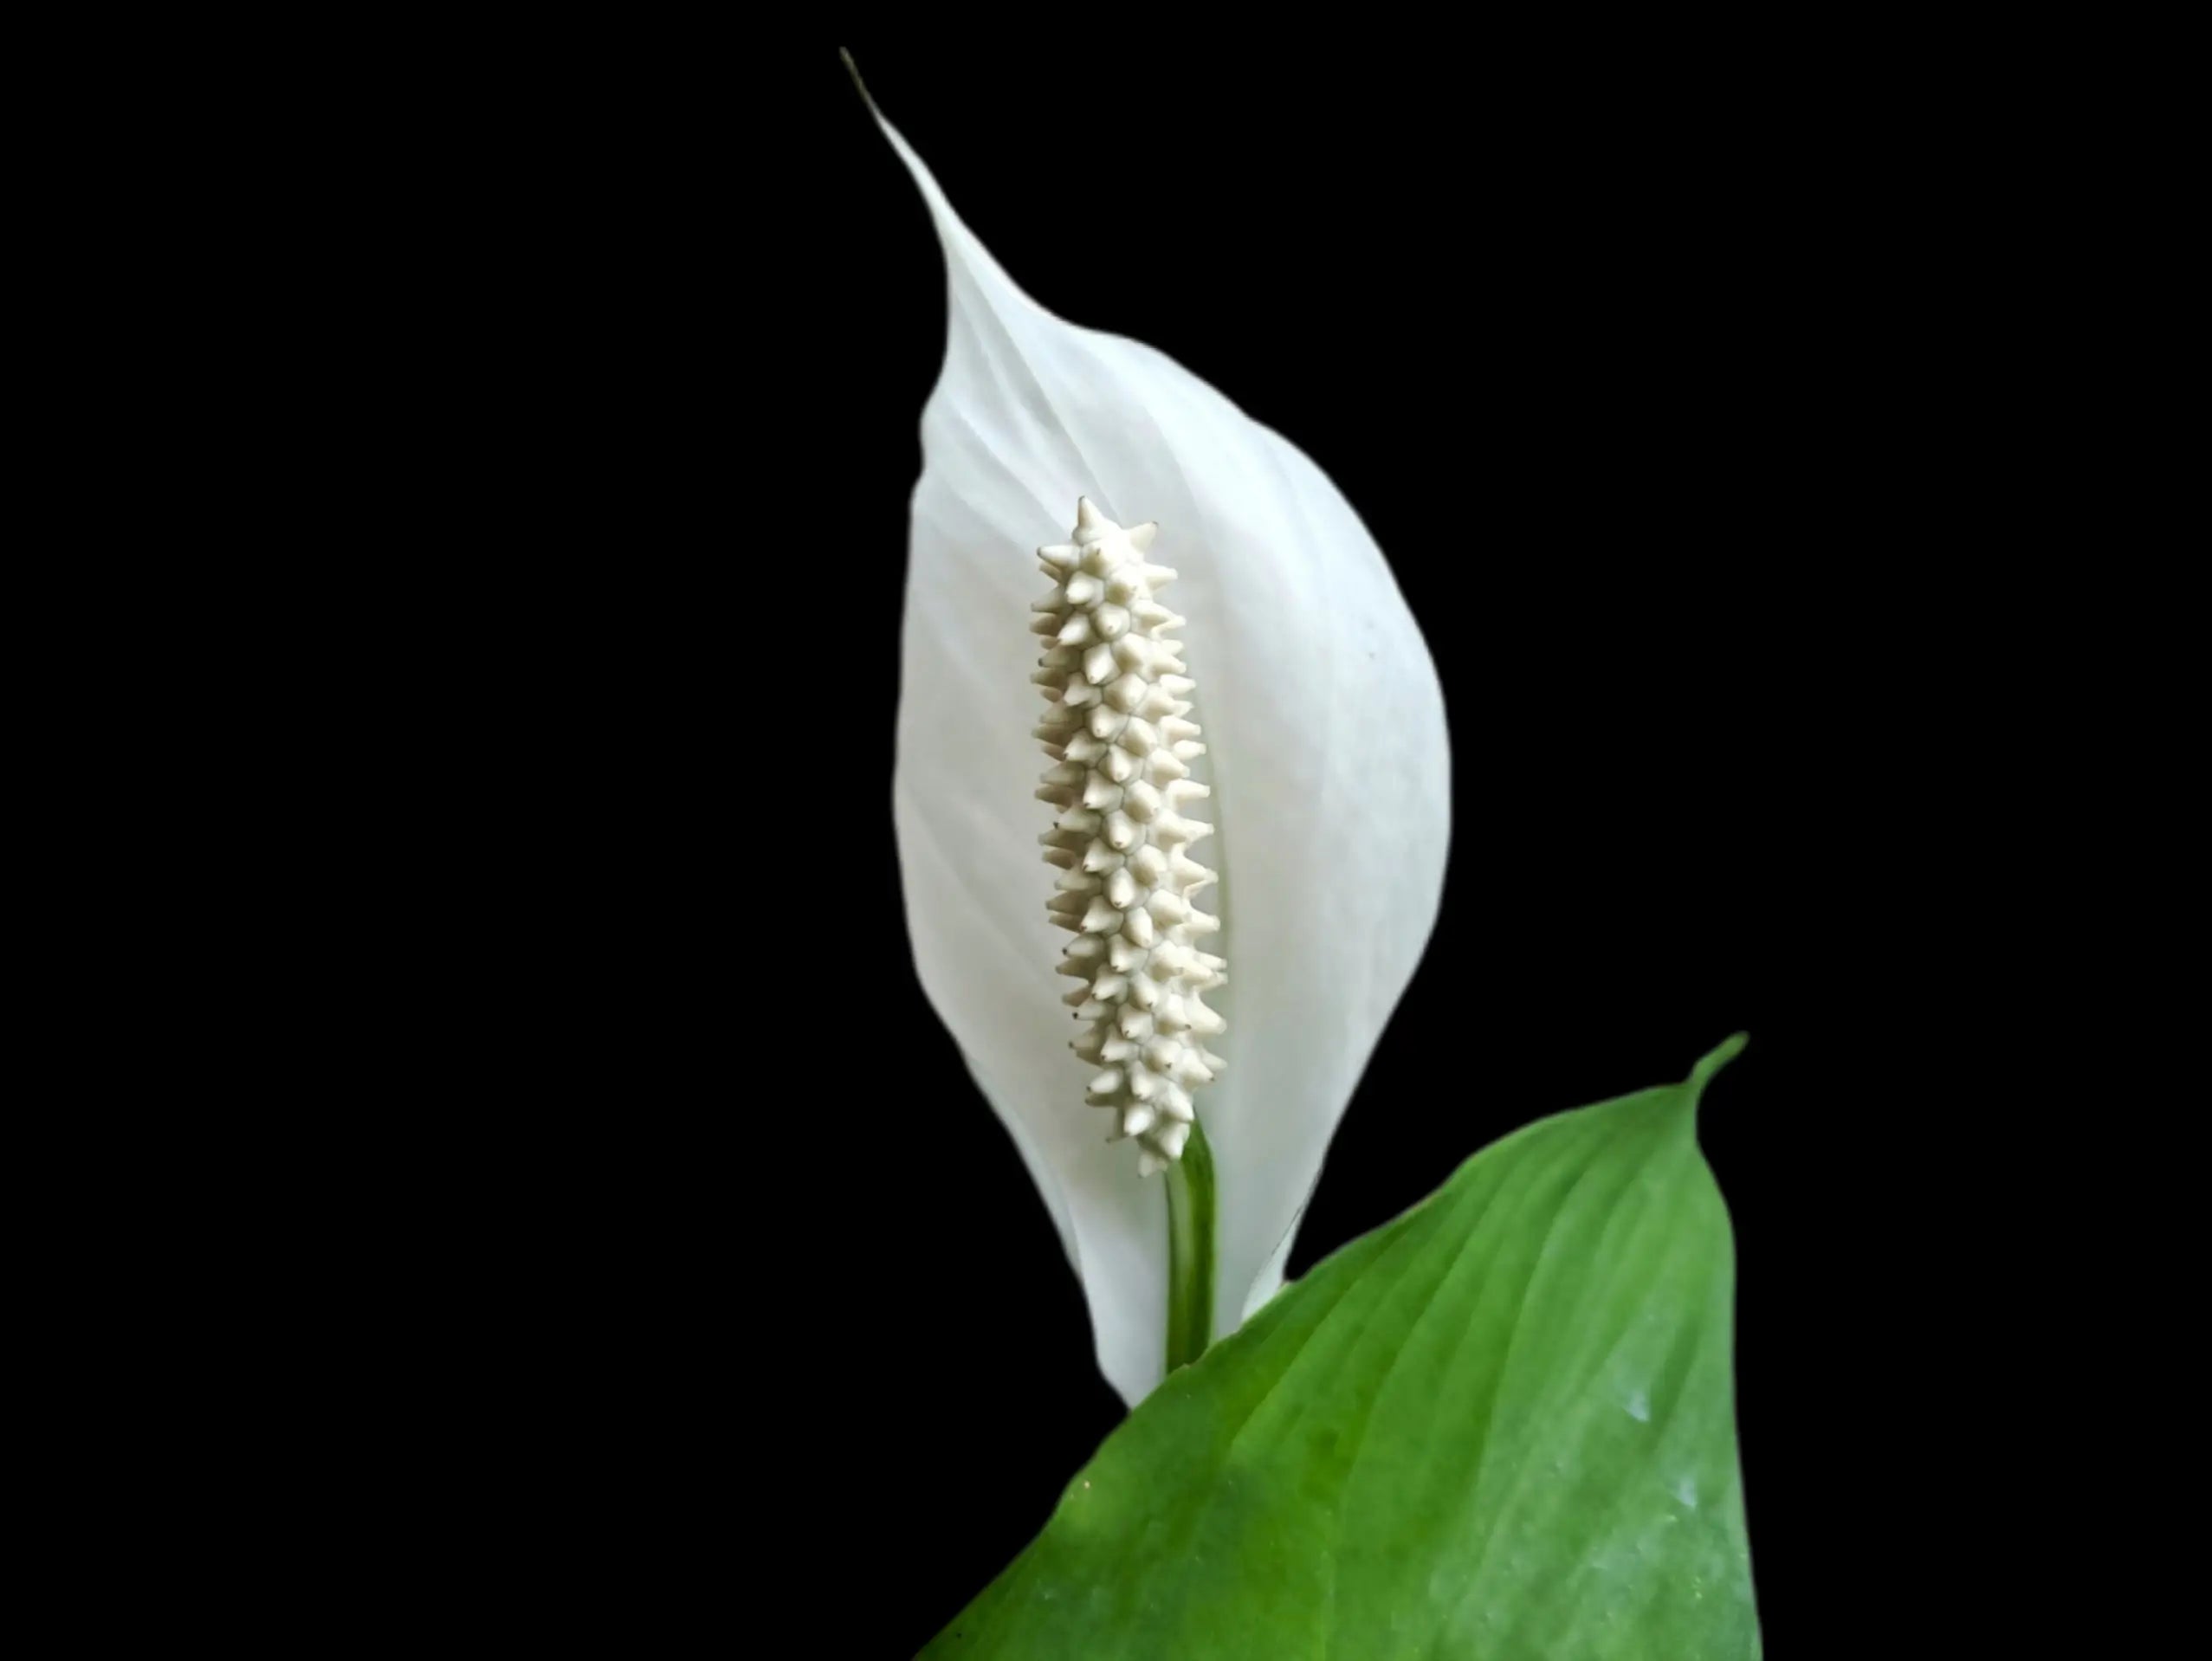
Alocasia can also flower indoors. You may see a leaflike hood, the spathe, wrapped around a central spike called the spadix. That spike carries many tiny flowers. In Alocasia, female and male flowers occupy different regions of the spadix and can be receptive or release pollen at different times. That timing helps explain why an indoor inflorescence does not necessarily form fruit. Berries may develop after successful pollination. They are not edible and must be kept away from children and pets.
An inflorescence can be part of healthy Alocasia growth. Leave it to develop if you want to watch the process; if it has faded or you prefer to remove it, cut cleanly without damaging the stem. Routine removal has not been shown to reliably increase leaf size or leaf number.
8. Yellow leaves, drooping and other common symptoms
When an Alocasia changes suddenly, start with the visible pattern: one yellowing leaf, a drooping canopy or marks spreading across a new blade. A soft base or rapidly collapsing plant needs immediate root and stem assessment before routine troubleshooting.

Start with the pattern, not a diagnosis
Look first at which leaves are affected. Is it one older outer leaf, the newest leaf or nearly the whole plant? Did the change develop slowly, or did several leaves collapse in a short period? Think about recent events: a delivery, repot, relocation, cold draught, hot spell or treatment spray. Check how damp the mix actually is, whether the pot is draining, whether the visible base is intact, and whether insects or their traces are present under the leaves or around new growth.
These observations often point to a sensible first action while the plant can stay in its pot. When the plant is otherwise stable, avoid changing its light, feeding, watering and substrate all at once: the response to any one change will be hard to judge.
What the leaves may be telling you
| What you see | What it may mean | Useful first check or action |
|---|---|---|
| One oldest leaf gradually turns yellow | Ordinary ageing, particularly while healthy growth continues | Check whether the remaining leaves and new shoot look sound; monitor. |
| Several leaves yellow quickly | Water stress, impaired roots, cold exposure, pests or another disturbance | Feel the mix below the surface, empty trapped runoff, check for cold exposure, and inspect the stem base and leaf undersides. |
| Leaves hang down and the mix is very dry | Water shortage or a dry core that has become difficult to rewet | Check below the surface; if genuinely dry, water and rewet evenly, then allow drainage. |
| Leaves droop while the mix remains wet | Roots may not be absorbing water effectively; chilling or decay are possible | Do not add water automatically. Check drainage and cold exposure; if the plant keeps declining or the base softens, inspect the roots and stem promptly. |
| Brown, papery tips or margins | Episodes of drying, salt buildup, excessive exposure, root stress or normal ageing | Check whether the pot has dried unevenly, whether feeding or direct sun recently changed, and whether new leaves are affected. |
| New leaves are small, torn or distorted | Incomplete expansion, physical damage, thrips or longer-term growing stress | Leave unfolding leaves alone; inspect folds and undersides for pests and watch subsequent growth. |
| Pale bleached or sharply scorched patches | Strong light or heat following exposure changes; sometimes spray injury | Check sun exposure and recent products; prevent further injury and assess new foliage. |
| Raised, corky or blister-like marks | Previous water-balance disturbance, insect damage or a physical scar | Check whether marks remain stable and whether newer leaves develop fresh marks. |
| Expanding, wet-looking or dark lesions | Injury or a possible infectious leaf problem | Separate the plant if lesions spread, keep foliage dry and compare dated photographs to see whether the area is enlarging. |
Similar-looking leaf changes can have several causes, and more than one factor may be involved. Start with the check that matches what you see, then watch whether the problem continues or new leaves develop more normally. If the plant declines quickly, use the urgent checks below.
Look closely at the newest foliage. Metallic, dark and variegated Alocasia can produce colours that differ from their mature leaves. Fresh scars, dark deposits or repeatedly distorted new blades call for careful pest checks in leaf folds and on undersides.
Old scars and bleached patches can remain visible after conditions improve. Check whether a suspicious mark is enlarging or newer leaves are developing fresh damage. Keep wet-looking lesions dry while investigating, and follow the guidance on leaf spots and possible infections if a patch continues to spread. Its appearance alone cannot identify a bacterial or fungal pathogen.
When to investigate more urgently
Rapid loss of several leaves, a collapsing plant in persistently wet medium, a soft or decomposing base, or lesions spreading quickly between leaves call for prompt action. A plant with watery, spreading stem decay should be kept away from the collection immediately; reducing watering alone is not an adequate response to suspected soft rot. Separate a plant with a plausible infectious problem from nearby plants while you investigate. Avoid splashing water or allowing runoff from the suspect pot to reach other plants, and do not share unclean tools or trays.
9. Root problems, stem rot and recovery
Roots may stop supplying enough water after severe drying, prolonged saturation, chilling, physical injury or disease. That is why a drooping Alocasia can still have a wet pot. If decay reaches the stem, a living growing point must remain for another shoot to develop.
When to inspect the roots
Before taking the Alocasia out of its pot, check how wet the root ball is, when you last watered, whether the drainage holes are clear and whether the plant still stands securely. Check the visible stem and the bases of its leaf stalks for unusual softness, wet tissue that is beginning to fall apart, or dark patches that spread quickly. Some Alocasia naturally have dark stems, so how the tissue feels and changes matters more than colour alone.
If the base is actively breaking down or leaking soft, wet material, isolate the plant and keep its substrate and runoff away from healthy pots.
A closer look at the roots is justified if several leaves continue collapsing while the pot stays wet, the base starts breaking down, or a strong unusual smell accompanies damaged tissue. A mix that no longer drains may also warrant inspection. If one older leaf fades while new growth remains firm, keep the plant in its pot and monitor it.
If inspection is warranted, support the root ball, gently squeeze the sides of a flexible nursery pot to release it, and slide the plant out. Avoid tugging by the leaf stalks. Separate only enough medium to see the suspect roots and the base of the stem. Washing the entire root system bare is not an automatic first step. Roots can be fragile, and unnecessary tearing may worsen an already difficult recovery.
What damaged roots and stems look like
Living Alocasia roots can be pale, cream, tan or brownish, depending on their age, substrate and species. Check whether they remain intact and resilient. Roots that turn mushy, fall apart or shed their outer covering to leave a thin thread are likely damaged. Examine several roots and the condition of the plant. An unusual sour smell accompanying collapsing tissue increases concern, although colour or odour alone cannot establish root rot or identify an organism.
Examine the stem base and any thickened storage stem separately. An Alocasia can sometimes recover after losing some roots. Decay that reaches the crown (the base of the main shoot) or destroys its growing points is much more serious. Soft, wet decay spreading around the leaf stalks or stem base is particularly worrying. A living storage stem may still develop new roots and a shoot after the leaves have fallen. A firm stem is encouraging, although infection can be present before it starts to soften.
Soft, spreading decay can involve infection within the living stem. In Alocasia, bacterial soft rot may be caused by Pectobacterium aroidearum, while fungal root or stem rot can involve Fusarium elaeidis. Dark roots, an unusual smell or a photograph cannot confirm the cause. Improved drainage can help surviving roots, but infection within the stem may continue to spread.
Saving viable tissue when possible
If some roots are decayed but the stem and its growing points are sound, use a clean, sharp tool to cut away mushy or disintegrating roots. Cut back to intact healthy tissue without removing sound roots or injuring buds. A tan but firm root should stay.
If infection is suspected, clean sap and soil from tools and disinfect them for the full label contact time between cuts and before using them on another plant. Bag severely decayed tissue and suspect medium for disposal according to local waste rules; do not reuse it in other pots or put suspected soft-rot material in home compost. Clean the work surface, pot and saucer before reuse.
If decay affects only a clearly defined part of a storage stem, carefully cutting away the damaged part may leave an intact growing point. If the remaining stem keeps turning soft and wet, there is no clear boundary to cut back to, or all growing points are destroyed, discard the unsalvageable tissue. Repeatedly cutting a rapidly disintegrating plant is unlikely to save it and may spread contamination. Dispose of tissue that is extensively soft, translucent or falling apart.
Do not divide or share a plant with ongoing suspected soft rot. An unaffected offset or bud-bearing propagule may be saved only if it can be separated with clean equipment and monitored in isolation. Cinnamon coatings, household peroxide baths and unverified fungicides cannot replace removing seriously decayed material and correcting the growing conditions.
Set the surviving stem or plant in a clean container that fits the healthy roots still present. Use an airy mix that holds some moisture without staying saturated. Keep vulnerable growing points clear of persistently wet material and give the plant warmth and filtered light, away from harsh sun while it has limited roots to take up water.
Moisten the new mix and let excess water drain. Then check it carefully before watering again; a plant with few working roots often uses water slowly. Keep enough moisture around developing roots without soaking the stem or repeatedly letting the roots dry out completely. Keep the recovery setup simple and avoid abruptly moving a failing plant into a complicated new growing system.
What recovery looks like—and its limits
A recovering plant may have very few leaves or none at all. Progress may begin quietly: the surviving stem stays firm, roots develop, a bud swells or a small spear appears before there is another fully opened leaf. Recovery can be slow. The pace depends on the species, the size of the plant and how much healthy tissue remains; there is no reliable universal timetable. A green leaf can still make sugars that support recovery, so leave it on the plant when possible.
While the plant recovers, avoid repeatedly pulling it out of its pot to check progress. Do not increase fertiliser to force growth: extra dissolved nutrients can stress a plant whose roots cannot yet use them well. Watch the base for renewed softening; visible foliage changes may lag behind those taking place below the surface.
If softening continues to spread, the base has been destroyed or no viable growing point remains, recovery may be impossible.
When roots and leaves are developing steadily again, return gradually to ordinary care. If soft rot or another transmissible infection was suspected, keep the plant separate through recovery and watch for renewed softening before returning it near other plants. One new leaf does not prove that an infection has been eliminated. If new damage appears on the leaves during recovery, inspect for pests and spreading leaf spots as well.
10. Pests and infectious leaf problems
Pests can leave marks on Alocasia leaves before you notice the insects themselves. Silvery feeding scars and dark specks may suggest thrips; fine pale stippling can accompany spider mites; white cotton-like clusters point towards mealybugs; fixed bumps may be scales; and small flies lifting from the pot often indicate fungus gnats. Find the actual pest before choosing a treatment, since old leaf damage can outlast the insects that caused it.
Finding the pest before treating
Turn over several leaves and inspect the veins, stalks, sheaths and tight spaces where the stalks emerge. Check new leaves without prising them apart. A hand lens and bright light can help reveal moving insects, pale young stages, tiny spots of waste or fine webbing. Check the same areas more than once: eggs and sheltered life stages may be missed, and fine mite webbing can be absent early in an infestation. Where a plant declines despite apparently suitable conditions, certain root pests are also possible, but disturbing the root ball is justified only when there is supporting evidence.
If you find live pests that can spread, move the Alocasia away from your other houseplants while you identify and manage them. Reinspect it and the plants that stood nearby every few days while the infestation is active, including new leaf folds and undersides. Clean the shelf or tray where pests may be hiding and remove loose shed foliage that may harbour insects. Not every blemish means a pest is present, and routine insecticide spraying of every new plant is unnecessary.
Common Alocasia pests and what helps
Thrips
These slender insects feed on young foliage, sometimes leaving silvery or pale scars, tiny dark deposits and distorted leaves. Eggs may be hidden inside tissue, and other life stages elsewhere in the growing environment. That is why no visible adults does not necessarily mean an infestation is over. Inspect emerging leaves and their undersides, and gently tap a suspect leaf over white paper to spot tiny moving thrips, using a hand lens if needed.
Remove accessible thrips carefully. Blue or yellow sticky traps help monitor flying adults but do not reach embedded eggs or all immature stages; position them carefully if beneficial insects have been released nearby, as they can trap non-target insects too. Predatory mites such as Neoseiulus cucumeris can target young thrips, while predatory bugs including Orius laevigatus may help in suitable enclosed conditions. Which predator works best depends on the thrips present, the stages you need to control and the warmth of the growing space. Follow the supplier’s release instructions.
Spider mites
Tiny pale pinpricks can give a leaf a gradually duller look. Delicate webbing may appear later, but it can be absent at first. Look along veins on leaf undersides for mites and pale shed skins. A gentle rinse can remove some mites from robust, smooth leaves if you protect the pot from excess water. Velvet and deeply textured leaves can be damaged by soaking or rubbing. For these plants, consider an appropriate predatory mite or a treatment labelled for indoor ornamentals and spider mites.
The predatory mite Phytoseiulus persimilis is useful against two-spotted spider mites under appropriate conditions. Other predatory mites have different target ranges and environmental needs. Humidity alone will not eliminate an established infestation; keep checking young and previously affected leaves after treatment.
Mealybugs
Small oval insects covered in white, cotton-like wax often hide where the leaf stalks meet the stem or beneath the sheaths around their bases. Sticky honeydew or black sooty growth can accompany heavier infestations. Remove small accessible groups gently with a soft cloth or tool, taking care not to damage delicate surfaces, then inspect again: sheltered adults and young stages may remain.
Root mealybugs may leave cottony or powdery white wax on the root ball, inner pot or around drainage holes. If these clues occur alongside unexplained decline, carefully inspect the roots. Surface deposits by themselves do not prove root mealybugs are present. The predatory ladybird Cryptolaemus montrouzieri can help with some mealybugs in suitable greenhouse-like conditions, but it is not a universal home remedy and may not reach root infestations.
Scale insects
These sap feeders often appear as small fixed brown, tan or pale bumps attached to stems, leaf veins or undersides. Soft scales commonly produce sticky honeydew, while armoured scales generally do not. Inspect closely before assuming that a normal bump or marking is an insect. Gently remove scales you can reach. If a leaf is heavily infested and already dying, removing that leaf may also help. The small, mobile young stages can remain after visible adult scales are removed, so inspect the same areas again for fresh insects. If more treatment is needed, identify the type of scale first. Biological controls and authorised sprays differ in which scales and life stages they can reach.
Fungus gnats
Small dark flies around the pot are often more of a nuisance to people than a threat to an established Alocasia. Their larvae live in damp organic mix, feeding mostly on fungi and decaying material, although tender roots and seedlings can sometimes be damaged. Yellow sticky cards catch flying adults and help show whether they are present, but do not reach larvae in the pot.
Check whether the medium is remaining excessively wet for this plant and container. For a persistent population, Steinernema feltiae nematodes or suitable soil-dwelling predatory mites can target larvae. Use them at the moisture and temperature conditions specified by the supplier. Do not repeatedly dry an Alocasia severely just to get rid of gnats.
Choosing treatments and checking progress
A leaf surface may look clean while pests remain tucked around stalk bases or inside a new fold. Once you identify the pest, choose a method that can reach those hiding places. Gently removing accessible insects may help with a small infestation. Other cases may call for suitable beneficial organisms or an authorised plant-protection product.
Alocasia leaves can be damaged by vigorous washing, oils, soaps, alcohol-based preparations and other sprays, especially young or velvet foliage. Something tolerated by one houseplant is not necessarily safe for another. Follow the label's crop, location and application directions. Carry out a small-area sensitivity test if the label requests it, remembering that one unaffected leaf cannot guarantee the safety of treatment on tender new growth. Avoid needlessly wetting unfolding leaves.
Before using a plant-protection product, check that it is currently authorised in your country for ornamental plants, the pest you have, the place you intend to use it and non-professional use where relevant. In Germany, the BVL authorised-products database provides this information. A product authorised for a greenhouse may be unsuitable or unauthorised in a living room. A recommendation on a US website does not confirm that a product is permitted in Europe. Use the labelled dose, protective measures and any repeat interval; there is no universal weekly treatment schedule. Keep children and pets away as directed.
Choose beneficial insects or predatory mites that target the pest and life stage you have found, and check that your growing conditions suit them. Tell the supplier about sprays used recently; some residues can still harm predators. Follow the release instructions, and check compatibility before using another insecticide while beneficial organisms are present.
After treatment, inspect the same sheltered areas and newest leaves for living pests, visible eggs or young stages and fresh damage. Learn to recognise released beneficial predators so they are not mistaken for pests. Old silver scars, yellow marks and stippling will remain; fewer living pests and no fresh feeding are better signs of progress. Follow the product label or biological-control supplier's schedule for repeat treatments. If living pests remain after completing that schedule, check that you identified them correctly before trying another method. Avoid mixing stronger solutions yourself or moving from one unrelated product to another.
Leaf spots and possible infections
Not every spot comes from feeding insects. Some patches follow sun scorch, cold contact, pressure damage, residue from sprays or water-related leaf injury. Raised, corky blisters can be consistent with oedema, a physiological problem linked to how water moves through a plant. Expanding, water-soaked, dark or sunken lesions may also be associated with infectious diseases. Fungi and bacteria can infect Alocasia leaves, but you cannot identify the cause reliably by the appearance of a spot alone.
If lesions are actively spreading, separate the plant and prevent splashes or runoff from reaching neighbouring pots. Keep foliage from staying wet, provide gentle ventilation without a cold blast and inspect nearby plants for new symptoms.
When a heavily affected leaf continues to develop spreading lesions, carefully removing it may reduce contaminated material. Use clean tools and discard the cut leaf and loose debris according to local waste rules. An isolated, stable blemish is no reason to strip healthy foliage. Clean the growing area and keep checking adjacent plants. These precautions may reduce transmission, but they cannot be relied upon to cure infection inside living tissue.
Recurring pale-and-dark mosaic patterns accompanied by deformation can occasionally signal a viral problem. Viruses have been reported in Alocasia, but patterned cultivars, thrips, nutrient disturbances and environmental injury can produce similar marks. Check for pests and growing problems and monitor new foliage before drawing conclusions. If infection remains strongly suspected, avoid sharing or propagating the plant. Specialist testing may help when an accurate diagnosis is important; insect sprays and fungicides cannot be relied upon to treat a plant virus.
11. Propagating Alocasia at home
A new Alocasia sometimes reveals its next generation when you lift the root ball: a little shoot with emerging roots beside the parent, or a firm rounded piece tucked among the older roots. These structures do different jobs, and recognising them helps you choose a propagation method that preserves the parent plant.
A new shoot needs a living growing point on the stem, an offset or a bud-bearing propagule. Roots supply water and nutrients as that shoot establishes; roots by themselves do not normally produce a replacement shoot when the growing point is missing. This explains why a detached Alocasia leaf and stalk left in a glass of water will not ordinarily develop into a new plant. Home growers have better options in rooted offsets, divisions and small pieces capable of sprouting from a bud.
The best time to divide a plant is when it has enough healthy tissue to spare and conditions favour new roots. A newly arrived, recently repotted or declining Alocasia generally benefits from recovery before planned propagation. Wear gloves when handling cut tissue, clean tools between plants, and keep offsets, leaves and discarded pieces away from children and pets. Do not take divisions from a plant with spreading soft rot or an unresolved infectious problem.
Separating offsets and dividing established plants
An offset is a shoot developing beside its parent. Some already have leaves and roots; others remain attached to the main stem and depend heavily on it. Look for a distinct shoot with its own roots before separating it. A small bud with little independent root tissue benefits from more time on the parent, especially when removal would take much of the parent's root system. Waiting protects both plants and gives the offset a better chance to establish.
If you are already repotting, that is a good time to see where the offset joins the parent. Slide the root ball out gently, loosen enough mix to understand the connection and avoid pulling stems apart by their leaf stalks. Where roots and connecting tissue can be teased apart without force, do so carefully. If a cut is needed, use a clean, sharp blade and make it where the connection is clear. Preserve healthy roots on the offset and disturb the parent as little as possible. Roots that have woven together tightly do not always need to be separated immediately.
Plant the offset in a container that suits its small root system, using a clean, airy mix that holds enough moisture for new roots. Place it in bright, filtered light and steady warmth. Check that the mix is appropriately damp around the existing roots, without leaving it saturated. The original leaf may remain unchanged for a while as its roots establish. A firm shoot and a new leaf beginning to develop are encouraging signs, and the pot may gradually begin to dry more quickly as new roots use water. Once growth resumes, adjust watering to the new root system and feed according to the fertiliser label.
A larger Alocasia may develop more than one established growing point on a substantial living stem. Division is possible when each piece can retain a viable bud or shoot and enough healthy stem and roots to recover. Having several leaves attached to one unbranched stem does not mean it can safely be divided into several plants. Examine the living structure before cutting, and avoid sacrificing an established crown just to make another pot.
If division is appropriate, remove only the mix necessary to locate the growing points, then separate the sections with a disinfected, sharp tool. Discard any decayed tissue and keep it out of the new pot. Wait until sap stops flowing from a fresh cut before placing the stem against damp mix. There is no fixed drying period that is suitable for every cut stem. Set each viable piece upright at a depth suited to its own form, support it if needed, and give the roots moisture and air as they re-establish. Handle a divided plant as a recovering plant, not one that immediately needs extra fertiliser or intensive watering.
Growing the small propagules often called corms
As you loosen mix around the roots, you may uncover small, rounded pieces near the plant’s base. Handle them gently so they stay intact. Growers often call these corms or cormels, although the precise structures vary among Alocasia species. For propagation, look for living tissue with a bud capable of producing a shoot.

A promising propagule usually feels firm when gently handled. Its outer covering may naturally be tan or dark brown, so colour alone cannot tell you whether it is alive. Look for an intact growth tip, without prising it open. A propagule that is soft throughout, smells foul or has spreading decay is unlikely to be useful. If it is firmly attached to the parent and removal would tear living tissue, it can often be left to develop for longer.
For a sound, unattached propagule, a small clear container with drainage lets you watch for roots near the sides without repeatedly digging up the piece. Use a clean, fine-textured medium that stays lightly moist while letting air through, such as a suitable propagation mix, perlite with a moisture-holding ingredient or carefully managed sphagnum.
If the shoot bud is visible, position it upward, with the base against the moist medium. If top and bottom are unclear, lay the piece on its side and cover it only lightly. For a piece that is already sprouting, keep the shoot above the damp medium while the emerging roots can grow into it. Provide warmth and bright filtered light, and keep the medium lightly and evenly moist without waterlogging it. Strong sun can overheat a small container quickly.
A loose transparent cover can help prevent a tiny shoot from drying out while its roots are small, but it should not trap stale, constantly dripping air. Ventilate it and check for standing condensation, softened tissue or mould. Avoid peeling away sound outer layers, repeatedly digging up the propagule or keeping it continuously under water as a default method. These actions can injure the very bud you are trying to protect. Some firm propagules sprout quickly and others remain inactive much longer. There is no dependable sprouting timetable or one ideal temperature for every Alocasia.
Once roots are developing and a new leaf is growing, let the young plant establish before changing containers or substrate. A small root ball is easily torn apart. If the initial container remains suitable and drains properly, there is no need to move the plant simply because the first leaf appears. If the plant needs a larger pot, move the delicate roots together with as much of their surrounding medium as possible and keep the growing conditions steady afterwards. Watch subsequent growth before beginning a normal feeding routine.
Flowers, seeds and inherited traits
After successful pollination, an Alocasia inflorescence can develop fleshy berries containing seeds. Seed-growing is an option for experienced growers, though less predictable than separating an established plant. Start with correctly identified, viable seed from a reliable source. For ripe berries produced after pollination, wear gloves, separate the seed carefully from the pulp and rinse gently.
Sow fresh, cleaned seed promptly in a fine, evenly moist medium. Give seedlings warmth, diffuse light and gentle ventilation, keeping the medium consistently moist and airy. Germination rates and seed storage life vary among Alocasia, so check emerging growth regularly and protect the young roots as they establish.
Seeds introduce genetic variation. The plant that carried the fruit provides only part of each seedling's genetic inheritance; pollen also contributes. Young plants may develop their own leaf shapes, colours and growth habits, even when the parent has a familiar cultivar name. Offsets and divisions are usually genetic copies of the parent plant, although variegation may still appear in changing proportions from leaf to leaf or shoot to shoot. Its stability depends on the plant and the way the variegation develops.
Specialist growers can raise Alocasia through tissue culture in sterile laboratories. Research with cultivated plants, including ‘Silver Dragon’, has produced shoots from leaf and petiole tissue using carefully controlled plant-growth regulators. Those laboratory methods require specialised equipment and controls. For a home collection, rooted offsets, divisions and viable bud-bearing structures are the practical options.
12. Alocasia species, cultivars and choosing a plant
Choosing an Alocasia becomes easier when you look at the plant as a whole, beyond the markings of a single leaf. Alocasia belongs to the aroid family, Araceae. Its species range from low, compact plants to those with substantial upright stems, and wild populations occur across tropical and subtropical Asia, the western Pacific and Australasia. Broad shield-shaped blades, deeply divided foliage, textured surfaces and metallic sheens give the genus much of its variety. The common name “taro” is used across aroid genera, including Alocasia and Colocasia, so a botanical name gives you a clearer starting point for identifying a plant.
Some wild Alocasia grow among leaf litter beneath taller trees. On Panay in the Philippines, Alocasia nycteris has been recorded on rocky ground and in secondary forest, where vegetation grows back after disturbance.

Choosing a type that suits your space
Begin with the space the whole plant will occupy at maturity. Check how tall and wide the species or cultivated form may grow indoors, then measure the space you have for it. Compact species such as Alocasia reginula, A. azlanii and A. melo may suit a bright shelf. Established A. macrorrhizos and A. portei need floor space and a stable container. Picture how far the leaf stalks and blades will extend beside furniture and walkways, and check the warmth and light available at that height. A humidity-sensitive or newly established selection may benefit from a well-ventilated cabinet; its new growth will show whether the arrangement works.
Large Alocasia and leaves with dramatic outlines
Large Alocasia may produce broad upright leaves or leaves divided into deep lobes, often on long stalks. Leave space for their leaves to open and spread. Cultivated forms such as Alocasia odora can also become tall and wide.
Alocasia macrorrhizos develops a broad, upward-growing canopy with giant leaf blades on long stalks and a stem that thickens as the plant matures. It can eventually become heavy enough to need a stable container and generous clearance for its leaves. Its history extends across central Malesia to Queensland, the range recorded by Kew. People have cultivated and moved this plant for centuries, making the precise limits of its original wild range difficult to untangle.

Alocasia portei, native to the Philippines including Luzon, develops enormous leaves with long, irregular lobes. All the lobes form one leaf, giving the mature plant its deeply cut outline. It can grow a substantial upright stem, with leaves spreading far to either side. Give the plant generous room and a stable container.

Alocasia brancifolia has long, slender leaf segments separated by deep gaps, creating an almost feathered outline. Recorded from Maluku and New Guinea, it develops these finely divided blades as the plant matures. Position it where the long segments can open and remain clear of neighbouring foliage.

Metallic leaves, velvet textures and compact species
Among compact Alocasia, look for metallic ridges that catch the light, dark velvety leaves with pale veins, and thick, puckered textures.
Alocasia cuprea has glossy, raised ridges that reflect copper, bronze and green tones as the viewing angle changes. Young leaves may be redder above; as they mature, their upper surfaces often deepen towards bronze-green while the undersides retain strong colour. This metallic species is known from Sabah and Sarawak in Borneo, and botanists have also found it in North Kalimantan.

Alocasia reginula, familiar as ‘Black Velvet’, carries dark, softly textured leaves traced with pale veins on a compact plant. Botanists first described it from a cultivated specimen, before its home in the wild was known. Later collections found it on heavily shaded karst cliffs at Tabin Wildlife Reserve in Sabah. That helps explain why older accounts sometimes disagree about where it grows in the wild.

Alocasia azlanii has glossy dark leaves with pinkish to purple veins that become especially noticeable as the viewing angle changes. Native to Brunei, it received its formal botanical description in 2016.

Alocasia infernalis has leaves so dark they can appear almost black, and the species has been recorded in shaded lowland habitats. In Alocasia baginda, raised veins give thick leaves a ridged texture. Plants sold as ‘Dragon Scale’ commonly have deeply textured, dark-green leaves, while ‘Silver Dragon’ has paler surfaces marked by darker veins. Alocasia melo develops thick, puckered leaves whose folds can resemble stone. Light falling from the side makes the raised surfaces of A. baginda and A. melo easier to see; allow enough space on a shelf or stand for their mature leaves to spread.
Patterned petioles, variegation and commercial names
The velvety, pale-veined leaves of Alocasia micholitziana are often sold as ‘Frydek’ or ‘Green Velvet’. These names are used inconsistently, so foliage alone may not confirm the exact cultivated selection. ‘Pink Dragon’ is another trade name without consistently verified parentage. Mature leaves and stalks can help you recognise what you have, even when a more precise name remains uncertain.

Alocasia zebrina has distinctive bands and mottling along its upright leaf stalks (petioles). You can see the markings clearly from the side, beneath the broad leaves. Give the stalks and leaves room as the plant grows.
The pattern on a variegated Alocasia can change from one new leaf to the next. White, cream, yellow and lighter green may appear in different proportions across the same plant. Look at several successive leaves to understand the pattern; one very pale leaf does not predict the colour of the next. Reliable cultivar information helps identify a named selection and its characteristic markings.
Nursery labels often carry the names ‘Amazonica’, ‘Polly’ and ‘Bambino’. The name Alocasia × amazonica was not formally established under botanical naming rules. Kew lists the historical hybrid as Alocasia × mortfontanensis, from A. longiloba and A. sanderi (an older name for the accepted A. sanderiana). The exact parentage of plants sold under those retail names may still be uncertain.
Plants sold as ‘Polly’ are commonly compact, with dark leaves and prominent pale veins. ‘Bambino’ often has narrower leaves. These characteristics help you describe and recognise the plant. Reliable growing or breeding records are needed to confirm a particular clone or its exact parentage.
When you know the mature size and leaf habit that will fit your space, you can see the forms currently available in our Alocasia collection.
A newly opened leaf reveals the colour and texture of your Alocasia. Between new leaves, the weight of the pot, the firmness of the stem and the pace of growth tell you how it is doing. Knowing what is normal for your plant makes it easier to water at the right time, leave healthy roots undisturbed and recognise a sudden change that needs attention.
13. Further reading and references
For readers interested in the plants' natural history, care and health, these sources provide further information on Alocasia names and habitats, growing conditions, propagation, pests and exposure safety.
- Kew — Alocasia in Plants of the World Online. The taxonomic overview, accepted names and recorded distributions.
- Alistair Hay (1998) — The genus Alocasia (Araceae-Colocasieae) in West Malesia and Sulawesi and Hay (1999) — The genus Alocasia (Araceae-Colocasieae) in the Philippines. Specialist descriptions of species and their distinguishing features.
- Aroidpedia — Alocasia identification, leaf morphology and reproduction. Detailed explanations of botanical characters, historical naming and flowers.
- Royal Horticultural Society — How to grow Alocasias. General household care and practical propagation guidance, to be adapted to the plant and conditions.
- RHS — Indoor sap-feeding pests and biological control. Pest identification, beneficial organisms and treatment compatibility.
- German BVL — Authorised plant-protection products. Current German authorisations and application restrictions; check the individual product before use.
- BfR — Poisonous plants and first aid and National Capital Poison Center — Alocasia exposure. Exposure precautions and first aid; follow your local poison centre’s advice.
- ASPCA — Alocasia toxicity to pets. Veterinary signs and the calcium oxalate hazard.
- German Federal Environment Agency — Ventilation and indoor humidity. Household humidity and mould-prevention guidance (in German), not a species-specific growing requirement.
- Sims and Pearcy (1992) — Alocasia macrorrhiza leaf response to brighter light. Experimental evidence on how leaf structure and photosynthetic capacity develop under different light conditions.
- Hsieh and Yeh (2025) — irrigation and nutrition trial with Alocasia ‘Bambino’. A controlled study illustrating why watering recommendations depend on the growing system and cultivar.
- Wong and Joling (2021) — checklist of aroids in Sabah and Asih and Lestari (2022) — Alocasia cuprea in North Kalimantan (journal PDF). Field-based evidence underlying selected species accounts.
- Tazmin et al. (2024) — tissue culture of Alocasia baginda ‘Silver Dragon’. An example of regeneration under controlled tissue-culture conditions, distinct from ordinary leaf cuttings.


Leave a comment