Alocasia Plants
Botanical Insights, Indoor Care, and Growing Tips
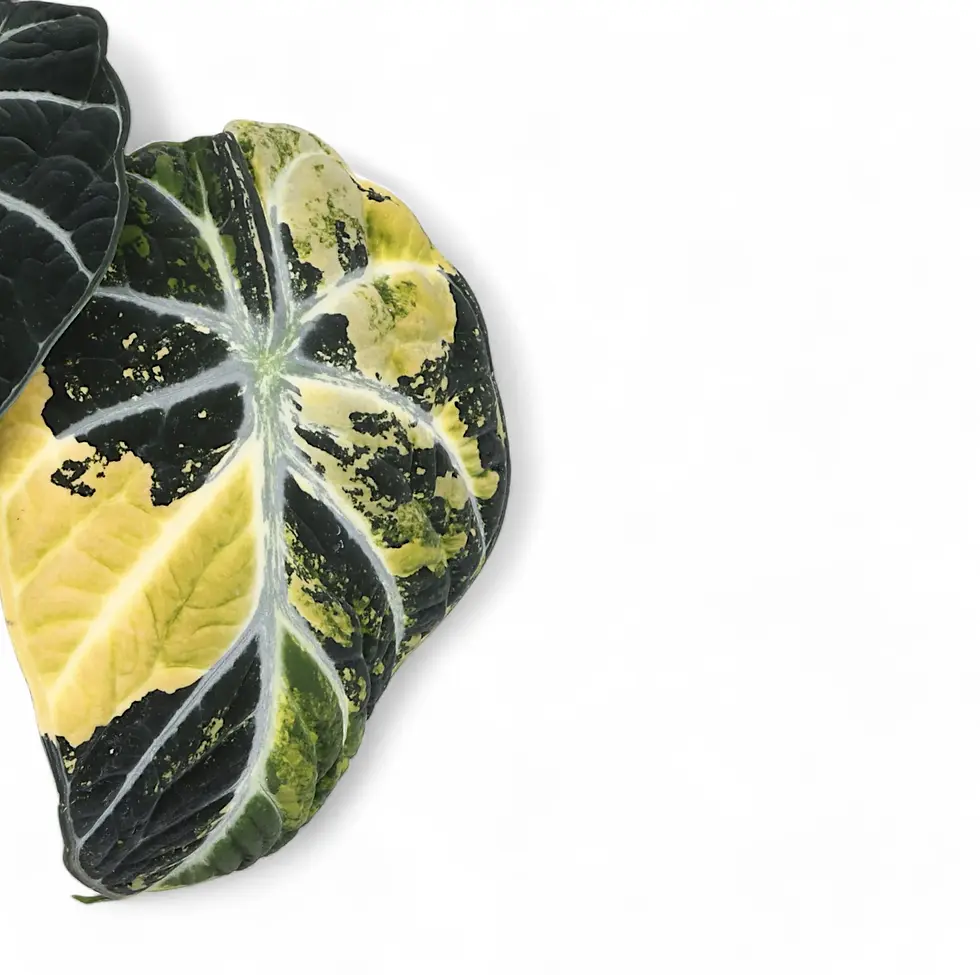
Alocasia is a genus of tropical perennials from the Araceae family, admired for its bold, arrow-shaped leaves and striking vein contrast. With more than 90 accepted species and numerous hybrids, Alocasia spans from compact collector plants to giants like Alocasia macrorrhizos, whose leaves can exceed 100 cm. Each species brings strong architectural structure and a touch of tropical drama that transforms any interior. Native to rainforests across Asia and Oceania, Alocasia thrives in bright, filtered light, stable warmth, and high humidity. When given well-aerated substrate and consistent care, it rewards growers with vigorous growth and sculptural foliage unlike anything else. Find your ideal match in our curated Alocasia collection — from velvety miniature hybrids to bold statement plants ready to anchor a modern interior.

Alocasia Names: Trade, Common & Regional
Alocasia species and hybrids circulate under a wide mix of trade and vernacular names. Many of these overlap with other aroids such as Colocasia and Xanthosoma, which often leads to confusion in horticulture. In horticultural trade, “Elephant Ear” is the most common label for large Alocasia like A. macrorrhizos, A. odora, and A. robusta—although the same term is also used for Colocasia and Xanthosoma. The main distinction lies in petiole attachment: Alocasia connects from beneath the leaf blade, whereas Colocasia attaches at the notch. The name “African Mask Plant” refers to Asian hybrids such as Alocasia ‘Polly’ and Alocasia ‘Amazonica’, while “Kris Plant” highlights their wavy leaf margins that resemble a Kris dagger. Other market names include “Mirror Plant” for the metallic foliage of A. cuprea and “Amazon Elephant Ear” for Amazonica-type hybrids. Modern collector favourites such as “Dragon Scale” and “Silver Dragon” describe striking A. baginda selections. Occasionally, even “Taro” or “Giant Taro” are misapplied to A. macrorrhizos, although true taro is Colocasia esculenta. Regional vernacular names vary widely. In the Philippines, A. macrorrhizos and Colocasia esculenta are both called Biga or Biga-Biga. In Hawaii, the same species is known as Ape, introduced by early Polynesian settlers. Across parts of the Pacific, local names such as Paiang or Hape appear, while in India, Telinga Hathi literally means “Elephant Ear” in Hindi. 💡 Did you know? Not all “Elephant Ear” plants are Alocasia. Many garden centres use that label for Colocasia or Xanthosoma. A quick check of the petiole attachment—beneath the blade in Alocasia, at the notch in Colocasia—reveals the difference instantly.

Alocasia Plant Guide: Care Tips, Origins, and Advice

💡 Did You Know?
Some Alocasia species exhibit thermogenesis, meaning their inflorescences can generate heat. This helps volatilize scents that attract specific pollinators like beetles.
Alocasia – Quick Genus Guide
Family: Araceae | Tribe: Colocasieae | Genus: Alocasia (Schott) G.Don
Alocasia includes around 90 accepted species native to tropical and subtropical Asia through to northeastern Australia. Most are rhizomatous or tuberous perennials forming upright stems or short trunks. Inflorescences follow the classic aroid pattern — a spadix surrounded by a spathe, often hidden beneath the foliage.
Foliage & Growth: Leaves range from arrow- to heart-shaped, usually 20–90 cm long, often with contrasting veins and surfaces that vary from glossy green to metallic or velvety textures. Depending on species, plants grow 30 – 300 cm tall and spread 30 cm to over 2 m.
Light & Climate: Bright, indirect light suits Alocasia best. Maintain 22–30 °C and humidity above 60 %; avoid cool drafts or extended dryness.
Soil & Watering: Use an airy, well-draining substrate that stays evenly moist. Allow the top 20% of soil to dry slightly before watering again.
General Care: Feed monthly with a balanced fertilizer during growth. Remove old leaves at the base and repot when roots crowd the container.
Safety Note: All Alocasia contain calcium oxalate and can irritate skin or mucous membranes; keep away from pets and children.

💡 Did You Know?
The largest Alocasia, A. macrorrhizos, can develop leaves over 1.5 m long, making it one of the most dramatic foliage plants in the Araceae family.
💡Did You Know?
Several Alocasia species are endemic to islands like Borneo and Papua New Guinea, meaning they occur nowhere else on Earth.

💡Did You Know?
Alocasia leaves have a hydrophobic cuticle that makes water bead and roll off quickly, reducing fungal risk during heavy rains.

💡Did You Know?
Alocasia species evolved strong petiole bases that act like hinges, allowing the plant to shed storm-damaged leaves without harming the rhizome.
Native Habitat & Ecology of Alocasia
Geographic Range
Alocasia species occur across the humid tropics of Asia and Oceania — from the Indian subcontinent and Sri Lanka through southern China, mainland Southeast Asia, and the Malesian region (Indonesia, Borneo, Sumatra, Sulawesi, the Philippines, and New Guinea) to northeastern Australia.
Borneo, Sumatra, and Papua New Guinea represent the richest biodiversity zones, with many species restricted to specific local microhabitats.
Typical Ecosystems
In nature, Alocasia occupies moisture-rich environments with filtered light and stable warmth:
-
Rainforest understories – shaded, humid, and consistently moist.
-
Riparian zones – along rivers and streams with aerated, organic soils.
-
Swamp margins – nutrient-heavy silts near permanent water bodies.
-
Montane cloud forests – up to ~2 000 m elevation with cool, mist-laden air.
💡 Some species such as Alocasia macrorrhizos tolerate canopy gaps and disturbed forest edges, adapting to brighter light than understory types.
Soil & Climate
-
Soil: Loamy or silty, enriched with decomposing plant matter; always moist but well-aerated.
-
pH: 5.5–6.5 (slightly acidic).
-
Temperature: Optimal 22–30 °C; growth declines below 18 °C.
-
Humidity: 70–90 % typical of tropical forests.
-
Rainfall: Usually above 2 000 mm per year.
-
Adaptation: Rhizomes and corms store reserves, allowing brief drought survival, though extended dryness is fatal.
Structural & Physiological Adaptations
-
Leaf design: Broad, sagittate blades capture diffuse light efficiently.
-
Hydrophobic surface: Water repels quickly, reducing fungal infection.
-
Robust petioles: Resist wind and heavy rain.
-
Phototropic behavior: Leaves constantly adjust toward optimal light angles.
Ecological Interactions
-
Pollination: Mostly by Cyclocephaline scarab beetles; many species use thermogenesis, warming the spadix up to 15 °C above ambient to release scent and attract pollinators.
-
Seed dispersal: Zoochorous — clusters of bright red or orange berries likely eaten and dispersed by birds or small mammals.
-
Mycorrhizae: Symbiotic fungi improve nutrient uptake in poor soils.
-
Defense: Calcium oxalate raphides deter herbivory.
Ecological Role
Alocasia shapes rainforest understories by intercepting rainfall, regulating soil moisture, and reducing erosion. Its large leaves create small microclimates that shelter insects, amphibians, and seedlings — contributing to local biodiversity.
Conservation
While Alocasia is not CITES-listed, several species face population decline due to:
-
Ongoing deforestation and habitat fragmentation
-
Conversion of rainforest to palm oil and agriculture
-
Illegal wild collection for the ornamental trade
Conservation now depends on tissue culture propagation, nursery cultivation, and responsible sourcing to reduce wild harvesting.
Styling & Interior Use – Showcasing Alocasia Indoors
Alocasia is more than foliage—it’s living architecture. With arrow- or heart-shaped leaves, bold veins, and tones from deep green to metallic silver and jet black, it commands attention in any room. Few houseplants combine such sculptural form and visual luxury, which is why designers and collectors treat Alocasia as a statement piece rather than decoration.
Why Alocasia Works in Interior Design
Three traits make Alocasia indispensable in modern styling:
-
Visual drama: Large, patterned leaves draw the eye instantly.
-
Colour diversity: From velvety emeralds to silvery or copper finishes.
-
Vertical presence: Upright petioles add structure and height to minimalist rooms.
Placed thoughtfully, Alocasia doesn’t just fill space—it defines it.
Best Placement & Light
Bright, indirect light is non-negotiable for maintaining that dramatic form.
-
Ideal natural light: East windows or 1–2 m back from south/west exposures, softened with sheer curtains.
-
Low-light interiors: Use full-spectrum LEDs (5 000–6 500 K) for 12–14 h daily.
-
Avoid: Dim corners or windowless rooms—growth will stall.
-
Keep away from: Radiators, heaters, or AC vents; sudden temperature swings damage leaves.
💡 Tip: Find detailed window guidance in our Window Orientation & Bright Indirect Light Guides.
Matching Plant Scale to Space
Size balance keeps interiors harmonious.
-
Compact cultivars (A. ‘Polly’, A. zebrina) suit shelves or grouped displays.
-
Large species (A. macrorrhizos, A. odora) need floor room, weight-stable pots, and overhead space for tall petioles.
Always allow room for leaves to unfurl fully. Use decorative cachepots with drainage inserts to avoid hidden rot.
Design & Styling Ideas
-
Planters:
-
Dark leaves pop in pale ceramic or stone containers.
-
Metallic or variegated forms shine in minimalist pots.
-
Terracotta and woven baskets give a relaxed tropical mood.
-
-
Plant pairings: Combine with ferns or Calathea for lush texture, or trailing Epipremnum for layered depth.
-
Trends: Perfect for Japandi minimalism, tropical luxe, and curated statement-plant interiors.
Humidity, Airflow & Maintenance
Visual perfection depends on microclimate stability.
-
Maintain 60–80 % humidity; 30–40 % dries edges fast.
-
Humidifiers outperform misting; grouping plants helps only slightly.
-
Ensure gentle airflow in humid areas to prevent fungal spotting.
-
Wipe leaves every few weeks to restore gloss and light efficiency.
Quick Styling & Care Reminders
✔ Bright, indirect light or grow lights for 12–14 h /day.
✔ Rotate plants for even symmetry.
✔ Keep soil airy; empty cachepot water.
✔ Space leaves to prevent pest buildup.
✔ Keep out of reach of pets and children—Alocasia is toxic if ingested.
Myth Check – Indoor Styling
✖ “Alocasia thrives in shade.” → False. Indoor “shade” is far dimmer than forest light; brightness is essential.
✖ “Misting keeps leaves hydrated.” → Temporary effect only—true humidity stability matters.
✖ “Any pot suits Alocasia.” → Cachepots without drainage hide rot; always ensure proper runoff.
✖ “Dust is harmless.” → A thin layer blocks photosynthesis and dulls sheen.
📌 Summary
Alocasia transforms interiors through bold architecture and colour.
For long-term elegance, provide bright, indirect light, stable humidity, and clean, well-draining pots.
Paired with thoughtful styling and regular leaf care, Alocasia elevates any room from simple to sophisticated.

Did You Know?
Some Alocasia species gently rotate their leaves toward changing light sources throughout the day—a subtle, dynamic adaptation called phototropism.
💡Did You Know?
Several Alocasia species have heterophyllous leaves, meaning juvenile and mature foliage have different shapes — a survival strategy linked to light availability and predator deterrence.
Alocasia Care Guide – How to Grow Thriving Tropical Sculptures Indoors
Few houseplants rival Alocasia for dramatic impact. With its bold, architectural leaves and unmistakable tropical presence, this genus turns any space into a living rainforest corner. Success with Alocasia depends on one simple rule: mimic the forest floor. Give it bright but filtered light, steady warmth, consistently moist substrate, and humidity that never crashes — and you’ll see vigorous growth, glossy new leaves, and that unmistakable jungle aesthetic collectors love.
Light for Alocasia – Getting Indoor Brightness Just Right
Light is the single most decisive factor in Alocasia care. In its native rainforest understory, this genus receives strong but filtered brightness that fuels those huge, sculptural leaves. Indoors, light intensity drops sharply, so correct placement is essential if you want steady growth and vivid colour.
Ideal Light Indoors
Alocasia thrives in bright, indirect light — similar to dappled sun under a forest canopy.
Good placements include:
-
East windows: gentle morning light that encourages firm, upright leaves.
-
South or west windows: fine if set back 1–2 m or softened with sheer curtains.
-
North windows: usually too dim alone, but can work with a supplemental grow light.
💡 Tip: Unsure how much light each window gets? See our Window Orientation Guide to match your space to your plants.
Light Intensity & Targets
A simple rule: if the plant casts a soft, clear shadow and the room feels bright all day, light is adequate.
For reference:
-
Maintenance growth: 1 500–3 000 lux
-
Strong growth: 3 000–5 000 lux, with gradual acclimation to prevent scorch
➜ More details in our Grow Light Setup Guide — covering lux meters, LED ranges, and positioning.
Seasonal Shifts
Light strength changes through the year.
-
Summer: even filtered light can burn jewel species like A. reginula — pull them slightly back.
-
Winter: days shorten; move plants closer to bright windows or use LEDs for 12–14 h daily.
Species Sensitivity
Large species such as A. macrorrhizos and A. odora handle some gentle direct sun once acclimated. Compact species like A. cuprea or A. reginula require consistent filtered light and scorch easily. Always adjust to your exact plant, not just the genus.
Common Light Mistakes
Two extremes cause most problems:
-
Excess light: crispy patches, faded colour, or leaf curl.
-
Insufficient light: stretched petioles, pale leaves, and stalled growth.
Rotate plants every few weeks so all sides get even exposure.
For elongated, weak stems, check our Leggy Growth Guide for corrective steps.
Grow Lights
When daylight isn’t enough, full-spectrum LEDs (5 000–6 500 K) work perfectly. Mount 30–45 cm above the foliage and run for 12–14 hours during darker months. Use a lux meter or reliable app to keep intensity consistent.
Myth Check
“Alocasia grows in shade” is misleading. In tropical forests, shade still measures several thousand lux. Indoor corners rarely exceed 300–500 lux — far too dim for sustained growth.
📌 In summary: Alocasia needs bright, indirect light year-round. Adjust placement by window type and season, supplement with LEDs when necessary, and your plant will maintain strong, upright leaves and continual new growth.
Temperature for Alocasia – Why Stability Is Everything
Alocasia evolved in warm, humid rainforests where temperatures barely fluctuate year-round. Indoors, even mild swings can shock the plant’s metabolism, stall root growth, or trigger sudden leaf loss. Warmth consistency—not just average temperature—is what keeps Alocasia thriving.
Optimal Temperature Range
-
Day: 22–30 °C – ideal for steady, balanced growth
-
Night: Never below 18 °C
⚠ Risk thresholds:
-
Below 18 °C: growth slows sharply
-
Below 12 °C: cold stress; dormancy likely
-
Below 10 °C: rhizome and root damage
-
Above 32–35 °C: heat stress—drooping, curling, and halted development
💡Did you know? In homes, the temperature near a window can drop 4–6 °C below the main room air—enough to trigger leaf collapse overnight.
Why Stability Matters
Sudden temperature swings, even inside the “safe” range, stress Alocasia. Typical symptoms include:
-
Yellowing or dropping leaves
-
Mushy petioles after cold exposure
-
Stalled or deformed new growth
Short cold spells often induce dormancy: the plant retreats into its rhizome until warmth returns. Recovery can take weeks and begins only once the environment stabilises.
Avoid These Temperature Hazards
-
Drafts from open doors or poorly sealed windows
-
Direct contact with cold glass or sills in winter
-
Hot airflow from heaters or AC vents
-
Uninsulated outer walls or cold floors
💡 Transport caution: Cold exposure during shipping (below 12 °C) can destroy leaf tissue and even damage corms.
Practical Temperature Control Tips
-
Use insulating cachepots or sleeves to buffer root temperature.
-
Place pots on wooden stands, cork mats, or risers—never directly on tile or stone.
-
In cool homes, a low-watt heat mat beneath the pot helps keep roots active.
-
Always monitor microclimates: the air near windows or floors is often several degrees colder than the rest of the room.
Species Sensitivity
-
Large species (A. macrorrhizos, A. odora): tolerate short dips but dislike repeated chills.
-
Jewel species (A. reginula, A. cuprea): highly sensitive; even one draft can cause full leaf collapse or extended recovery.
Recovery After Cold Stress
If the plant suffers shock:
-
Remove collapsed or mushy foliage.
-
Check rhizomes and roots; cut away rot.
-
Keep in stable warmth with moderate watering.
-
Be patient—recovery usually starts from the rhizome, not damaged leaves.
Myth Check
✖ “Room temperature is always fine.”
False. “Room temperature” near windows often drops below 18 °C at night—already stressful for Alocasia. Use a thermometer at plant level, not across the room.
📌 Summary
Alocasia thrives between 22–30 °C and deteriorates quickly outside that band. Avoid cold drafts, sudden changes, and overheating. The more stable the temperature, the more reliable the growth.
Humidity for Alocasia – Why It Matters and What Actually Works
In the rainforest, Alocasia grows in air that’s almost always moist. Indoors, dry air is one of the biggest hidden stress factors. When humidity drops too low, leaves crisp at the edges, new growth struggles to unfurl, and pest outbreaks — especially spider mites and thrips — become far more likely.
Ideal Humidity Range
-
Healthy growth: 60–70 % RH
-
Optimal for jewel and sensitive species (A. reginula, A. cuprea): 70–80 % RH
⚠️ Most homes sit around 30–40 % RH, particularly in winter with central heating — far too dry for Alocasia. Sustained dryness is one of the most common causes of decline indoors.
🌡 Heat interaction: When temperatures rise above 28–30 °C, plants lose moisture faster and need higher humidity to stay hydrated.
Signs of Low Humidity
-
Brown or crispy tips despite correct watering
-
New leaves stuck or collapsing before unfurling
-
Increased pest activity — spider mites, thrips, or mealybugs targeting stressed tissue
How to Raise Humidity
-
✔ Humidifier: The only consistent, controllable method for household use.
-
✔ Closed environments: Glass cabinets, terrariums, or grow tents create perfect microclimates for jewel Alocasia.
-
✔ Plant grouping: Slightly slows evaporation but doesn’t meaningfully raise humidity.
Full comparison here: Mastering Humidity for Healthier Houseplants
What Doesn’t Work (Common Myths)
-
✖ Misting: Raises humidity for only minutes — mostly cosmetic.
-
✖ Pebble trays: Surface area too small to change RH unless sealed.
Curious why misting fails? Read To Mist or Not to Mist?
Extra Tips for Stable Humidity
-
✔ Measure humidity with a digital hygrometer at plant level — air near windows is usually drier.
-
✔ Pair high humidity with gentle airflow to avoid fungal spotting.
-
✔ In winter, combine a humidifier with stable warmth to prevent dormancy.
-
✔ Don’t expect crisped leaves to recover — only new growth will improve once humidity is corrected.
Species Sensitivity
-
Large species (A. macrorrhizos, A. odora): tolerate around 50 % RH but perform better above 60 %.
-
Jewel species (A. reginula, A. cuprea, A. nebula): need 70 % + RH and often thrive best in enclosed or semi-sealed setups.
📌 Summary
Alocasia thrives in humidity above 60 %, and jewel species prefer 70–80 %. The most effective indoor solution is a humidifier or enclosed cabinet, not misting or pebble trays. Track RH with a hygrometer and combine warmth with airflow for consistent, healthy growth.
Airflow for Alocasia – The Overlooked Key to Healthy Growth
Light, warmth, and humidity keep Alocasia growing — but clean, gentle air movement keeps it alive and problem-free. In tropical forests, constant breezes dry leaf surfaces, regulate temperature, and limit fungal growth. Indoors, still air does the opposite: it traps moisture, encourages fungal spots, and lets pests like spider mites or thrips multiply fast.
Why Circulation Matters
-
✔ Reduces fungal and bacterial disease by drying leaf surfaces
-
✔ Helps leaves dry after guttation or watering
-
✔ Discourages pests — mites and thrips thrive in stagnant conditions
-
✔ Keeps high humidity from turning into condensation and rot
-
✔ Evens out temperature, preventing leaf curl and heat stress
How to Spot Poor Air Movement
-
Repeated outbreaks of leaf spot or mildew
-
Musty smell in enclosed cabinets or tents
-
Rapid spread of spider mites or thrips
-
Water droplets lingering for hours on leaves
If you notice any of these, improving circulation should be the first fix before reaching for treatments.
Creating Safe Air Movement Indoors
-
✔ Use a low-speed oscillating fan placed several metres away to keep air gently moving.
-
✔ Crack a window occasionally when outdoor temperatures are safe.
-
✔ In cabinets or terrariums, run small USB fans on timers to keep humidity high but air fresh.
💡 Tip: Air movement works best together with humidity control. Without ventilation, even a humidifier or cabinet quickly turns into a pathogen incubator. Learn the balance in Mastering Humidity for Healthier Houseplants.
What to Avoid
-
✖ Direct drafts from doors or unsealed windows
-
✖ Hot or cold blasts from heaters or AC vents
-
✖ Fully sealed cabinets without internal fans
Seasonal & Microclimate Notes
-
Winter: Ventilate carefully — sudden cold air can shock leaves and trigger dormancy.
-
Summer: Gentle airflow prevents overheating above 28–30 °C.
-
Microclimates: Air near windows or walls can be several degrees cooler; always check the actual plant zone.
Species Sensitivity
-
Large species (A. macrorrhizos, A. odora): broad leaves trap moisture; extra ventilation prevents fungal spotting.
-
Jewel species (A. reginula, A. cuprea): need cabinet fans to keep humid air moving and avoid rot.
Recovery After Stagnant Air
-
Remove leaves showing fungal damage.
-
Introduce airflow gradually — avoid strong blasts.
-
Keep humidity stable while minimising leaf wetness.
-
Monitor for pests; mite populations drop quickly once air moves again.
📌 Summary
Alocasia flourishes with gentle, consistent airflow, not harsh drafts. Balanced ventilation maintains humidity, deters fungi and pests, and supports vigorous growth. Whether your plant lives in an open room or a display cabinet, steady air circulation is as vital as light and water.
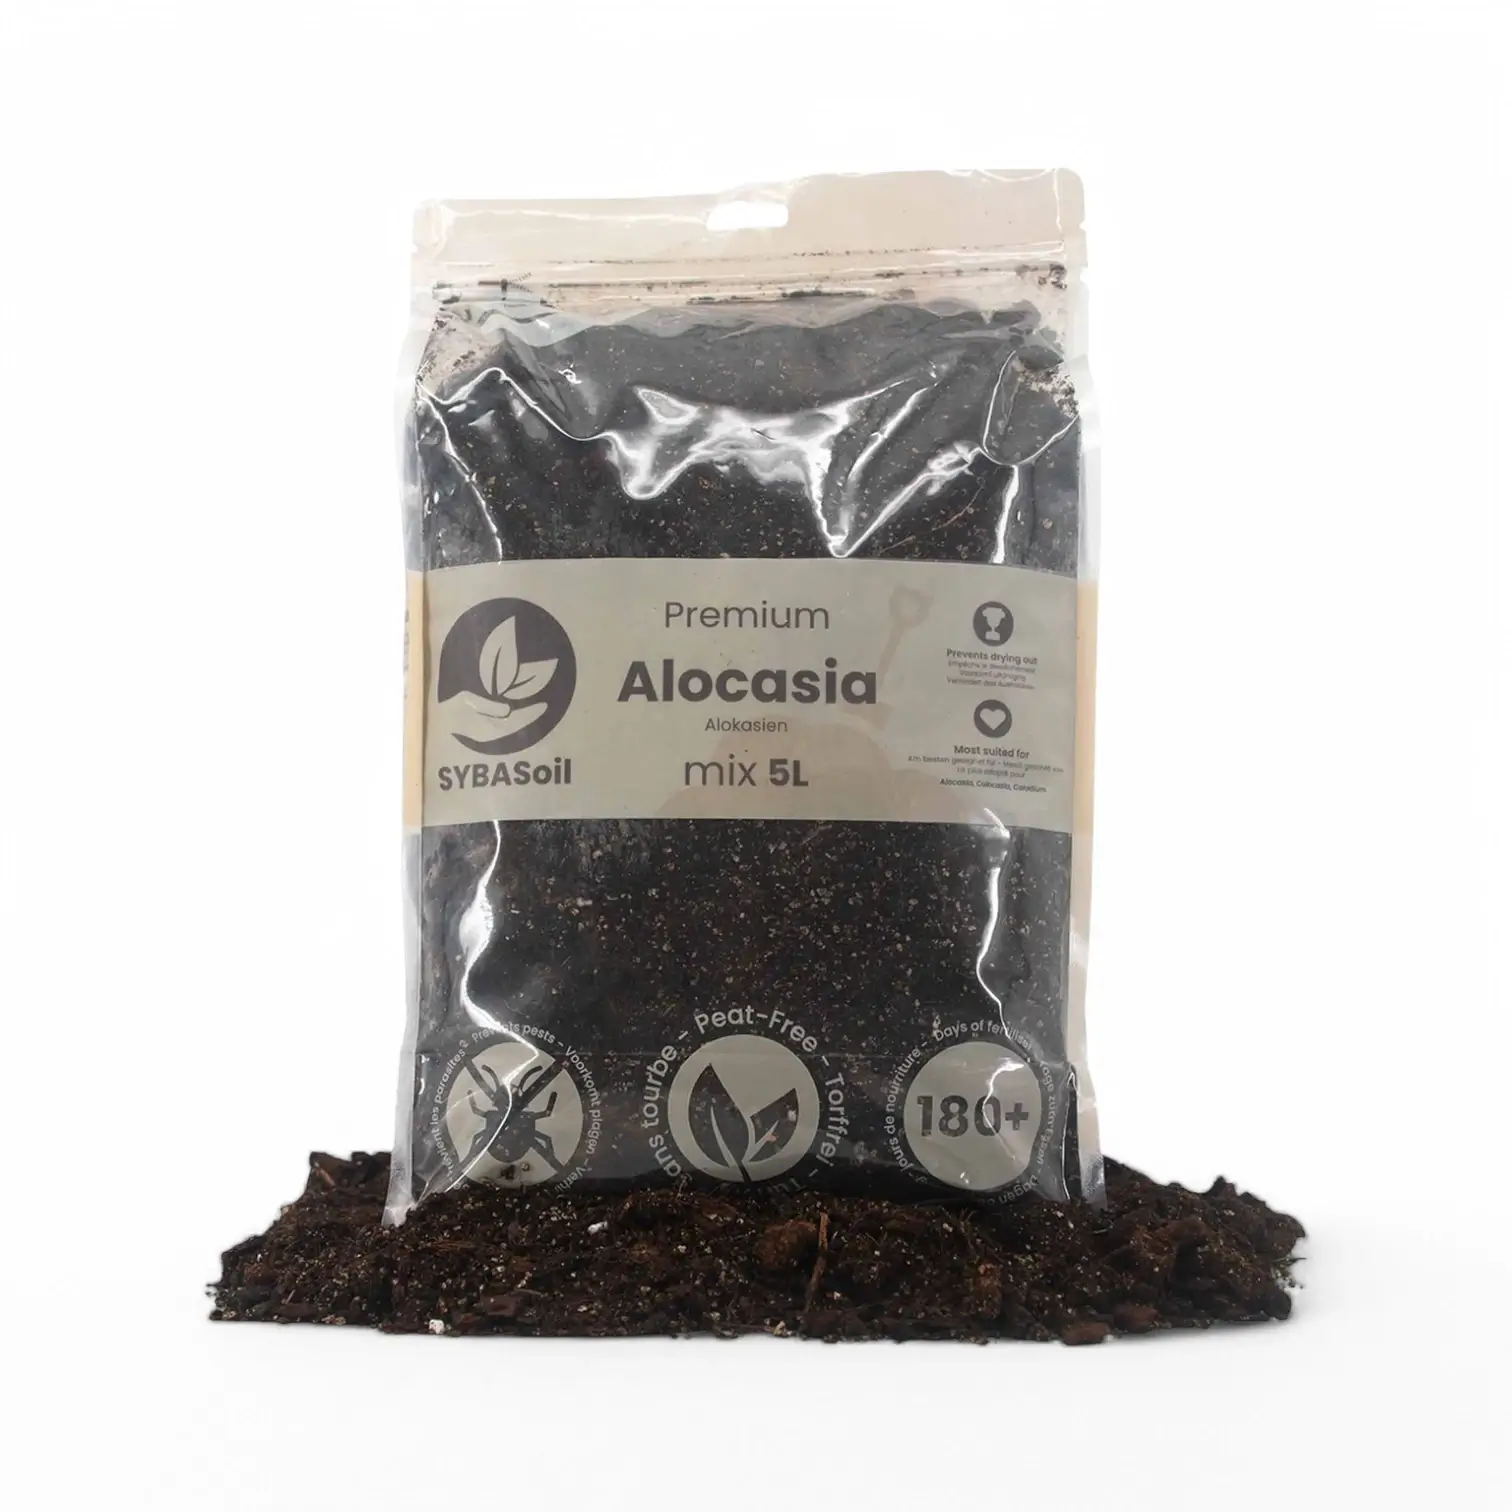
Soil & Potting Mix – Building the Perfect Foundation for Alocasia Roots
Strong Alocasia growth starts below the surface. These tropical perennials rely on a substrate that balances moisture retention with aeration — enough water to hydrate roots, yet enough airflow to prevent rot.
A dense, soggy mix suffocates rhizomes, while one that dries too fast triggers leaf drop and stress. Finding that equilibrium is the key to long-term success.
Ideal Mix Composition (and Why It Works)
-
✔ 40 % coco coir or sphagnum peat – retains moisture while staying lightweight
-
✔ 30 % orchid bark or husk chips – provides chunky structure and air gaps, mimicking rainforest soil
-
✔ 20 % perlite or pumice – improves drainage and oxygen supply
-
✔ 10 % organic matter (e.g., worm castings) – adds slow-release nutrients and microbial support
⚠ Over time, organics break down and compact, reducing aeration. Refresh the mix regularly to keep roots oxygenated.
Learn more: Best Aroid Substrate – Root-Matched Mixes
Optional Additives
-
✔ Activated charcoal – absorbs toxins and keeps the mix fresh
-
✔ Zeolite – stabilises minerals and buffers salts
-
✔ Rice husk biochar – boosts porosity and microbial balance
Full overview: The Complete Aroid Substrate Guide: Match Mix to Roots
pH Target
Slightly acidic (5.5 – 6.5) is ideal for nutrient uptake and healthy Alocasia root function.
What to Avoid
-
✖ Heavy garden soil – compacts easily and cuts oxygen flow
-
✖ Pure peat or coco – holds water but lacks structure
-
✖ Dense bagged houseplant soil – often fine-textured with no chunky elements
Learn why “drainage” ≠ oxygen supply in Drainage vs Aeration in Potting Mixes
Container & Drainage
-
✔ Always use pots with drainage holes
-
✔ Remove inner pots from cachepots before watering and empty excess water
-
✔ Transparent nursery pots make it easy to check root health
-
✔ Pot materials matter: terracotta dries faster, plastic/ceramic retain more moisture
Repotting & Maintenance
-
Refresh or repot every 12–18 months; old mix compresses and suffocates roots
-
Position the rhizome just under the surface — burying too deep invites rot
-
Trim soft or dark roots before replanting in a fresh, airy mix
Step-by-step guide: Repotting Houseplants
Alternative: Semi-Hydro & Mineral Mixes
Many collectors grow Alocasia in inert, mineral substrates (pon, pumice, lava rock, LECA). These setups:
-
Provide excellent oxygenation
-
Work with self-watering or wick systems
-
Require full nutrient supplementation
Semi-hydro is especially useful for jewel Alocasia that dislike fluctuating moisture.
Learn how to transition: From Soil to Semi-Hydro
Pest & Fungal Considerations
-
Rich, organic soils attract fungus gnats; chunkier, mineral-heavy mixes reduce the issue.
-
Poor aeration fosters root rot and fungal pathogens — airflow through the mix is your best prevention.
If gnats appear, read: Controlling Fungus Gnats – A Guide for Indoor Gardeners
📌 Summary
The best soil for Alocasia is lightweight, breathable, and nutrient-rich, not heavy or muddy. Refresh it regularly, keep rhizomes shallow, and tailor moisture to your watering style. Whether you choose an organic blend or semi-hydro system, the goal stays the same: oxygenated roots, firm rhizomes, and vigorous, healthy growth.
Repotting Alocasia – When and How to Do It Right
Repotting keeps Alocasia vigorous by refreshing compacted soil, allowing root expansion, and reducing pest buildup. Done properly, it encourages new leaves and stronger growth; done hastily, it can cause weeks of setback. The goal is always a gentle reset, not a dramatic transplant.
When to Repot
Every 12–24 months, or sooner if you notice:
-
Roots tightly circling the pot
-
Water running straight through or draining very slowly
-
The plant leaning or top-heavy
✔ Best time: during active growth when new leaves appear — recovery is fastest.
✖ Avoid: repotting during full dormancy, when roots are inactive.
💡 Tip: Sometimes a partial refresh is enough — replace the top 3–5 cm of mix to extend soil life before a full repot.
Learn more about soil breakdown in The Ultimate Guide to Houseplant Substrates
Choosing the Right Pot Size
✔ Increase pot diameter by only 2–3 cm — gradual upgrades prevent waterlogging.
✖ Oversized pots retain excess moisture, heightening rot risk.
If offsets or pups crowd the pot, divide them into new containers for balanced growth.
Selecting Pot Materials
-
Terracotta: Breathable and fast-drying — ideal for humid homes.
-
Plastic or glazed ceramic: Retains moisture longer — suitable for drier rooms.
-
Transparent nursery pots: Excellent for rare or sensitive species where root health needs monitoring.
Root & Corm Care During Repotting
-
Examine rhizomes and corms; trim soft or dark sections with sterile tools.
-
Remove dead or circling roots to stimulate new growth.
-
Inspect for root mealybugs or fungus gnat larvae — treat before replanting.
See: Controlling Fungus Gnats – A Guide for Indoor Gardeners -
Replant with the corm positioned shallowly, just beneath the surface — burying too deep invites rot.
Aftercare for a Smooth Recovery
-
✔ Water lightly to settle the mix; avoid full saturation immediately.
-
✔ Keep in bright, indirect light with stable humidity.
-
✔ Wait 2–3 weeks before fertilising to allow root recovery.
-
✔ Expect mild drooping or slowed growth — once a new leaf emerges, acclimation is complete.
Detailed walkthrough: Repotting Houseplants – A Complete Guide
Myth Check
✖ “Repot only in spring.” → False. Any active growth period works; timing follows the plant, not the season.
✖ “Alocasia like to be root bound.” → False. They decline in compacted soil — thriving only in loose, oxygen-rich mixes.
📌 Summary
Repot Alocasia roughly every one to two years into a fresh, airy mix that balances moisture and oxygen. Keep pot size modest, trim damaged roots, divide offsets as needed, and maintain gentle aftercare. Correct timing and substrate quality matter far more than calendar date.
Dormancy in Alocasia – What It Really Means
Dormancy in Alocasia is often mistaken for decline or death, but it’s simply a protective pause. The plant slows metabolism to conserve energy when conditions turn unfavourable — most often when light, warmth, or humidity drop. Recognising dormancy correctly prevents many perfectly healthy plants from being thrown away.
What Triggers Dormancy
The main trigger is reduced light. Shorter, dimmer days signal the plant to rest, which is why dormancy usually appears in winter.
Temperature matters too: sustained readings below 18 °C slow metabolism, and anything under 15 °C often pushes Alocasia into dormancy.
Stress can have the same effect. Repotting shock, root disturbance, underwatering, or very low humidity may cause a temporary growth pause. Plants shipped in cold months frequently enter a “mini-dormancy” until warmth and light return.
Learn more: Houseplant Acclimatization Guide
How to Recognise Dormancy
A dormant Alocasia stops producing new leaves; older foliage yellows and drops. Some jewel types can lose every leaf.
The key check is the corm — if it feels firm and solid beneath the surface, the plant is still alive.
Dormancy is temporary. Depending on species and environment, it can last from several weeks to a few months. Once light and warmth improve, fresh shoots emerge again.
Dormancy vs. Root Rot
They can look identical from above.
-
Dormant plant: corm firm, no foul smell, roots pale and healthy.
-
Rot: corm soft or hollow, roots dark and slimy.
Overwatering in compact soil is the fastest way to turn rest into rot.
Read: Drainage vs. Aeration in Potting Mixes
Caring for a Dormant Alocasia
Scale back, don’t abandon.
-
Keep the mix slightly moist, never bone-dry.
-
Stop fertilising until new growth resumes.
-
Maintain 15 °C + to keep the corm viable.
-
Check corm firmness every few weeks.
If all foliage is gone, the corm can rest in slightly moist substrate until it re-sprouts. When new leaves appear, resume normal watering and light feeding — treat it like a newly acclimating plant.
Species Differences
-
Large species (A. macrorrhizos, A. odora): seldom go fully dormant indoors; growth just slows.
-
Jewel species (A. reginula, A. cuprea, A. nebula): often drop all leaves before restarting.
-
Under stable grow lights and warm, humid air, many Alocasia skip dormancy entirely and keep producing leaves.
More detail: Dormancy in Houseplants – Complete Guide
Myth Check – Dormancy Misconceptions
✖ “Dormancy means death.” → False. The corm is a survival organ that reactivates when conditions improve.
✖ “All Alocasia go dormant in winter.” → False. Many stay evergreen indoors under steady warmth and light.
✖ “Water as usual during dormancy.” → False. Excess moisture leads straight to corm rot.
✖ “Leaf drop is permanent.” → False. If the corm is firm, new shoots will return.
📌 Summary
Dormancy is Alocasia’s natural survival strategy, not a death sentence. It’s triggered by low light, cool temperatures, or stress, and may last weeks or months. Keep the substrate just moist, avoid fertiliser, and maintain gentle warmth. With patience and stability, your Alocasia will reawaken strong and ready for new growth.
Alocasia in Semi-Hydro & Inert Media – How to Get It Right
Semi-hydroponic growing makes watering far more predictable for Alocasia. When managed correctly, it provides a constant balance of moisture and oxygen and dramatically reduces the risk of rot. The trade-off: without organic soil, you lose the natural buffer for nutrients and pH — so precision matters. This method suits growers comfortable with monitoring details like EC, pH, and water quality.
When to Transition
Move a plant into semi-hydro only during strong active growth, when roots and leaves are developing. Ideal moments include:
-
After repotting, when roots are expanding
-
When recovering from soil-based rot, to reset in clean inert media
-
For collectors seeking controlled cabinet or tent environments
✖ Never transition a dormant or stressed plant — inactive corms can’t adapt and usually rot.
Step-by-step guide: From Soil to Semi-Hydro – The Complete Guide
Choosing the Right Medium
-
✔ LECA (Lightweight Expanded Clay Aggregate): reusable, airy, and inexpensive, but needs soaking and frequent flushing.
-
✔ Mineral blends (e.g., pon): hold moisture more evenly and include trace elements, making them more forgiving.
-
✖ Avoid organics such as peat, coco, or compost — they decompose, clog pores, and destabilise nutrient balance.
More options: Non-Organic Plant Substrates for Semi-Hydro Systems
Root Adaptation & Recovery
Soil roots rarely convert directly to hydro conditions. Expect many to die back as the plant forms new hydro roots designed for wicking moisture. This process can take several weeks, during which visible growth slows.
💡 Keep the corm above the water line at all times. If submerged, it will rot quickly.
Water & Nutrient Management
-
Maintain a constant reservoir that allows roots to wick moisture but never touches the corm.
-
Use a complete hydroponic nutrient — soil fertilisers lack key minerals.
-
Target EC 0.8–1.2 mS/cm and pH 5.8–6.2.
-
Flush every 2–4 weeks to remove salts and biofilm.
-
Add Cal-Mag when using RO or distilled water to prevent deficiency.
See nutrient strategies in The Ultimate Guide to Fertilising Houseplants
Stability & Maintenance Tips
-
Use clear pots or water-level indicators for easy monitoring.
-
Clean reservoirs regularly to prevent algae buildup.
-
Combine semi-hydro with gentle airflow and 60–70 % humidity for balanced hydration.
-
Expect adjustment time — success shows once new hydro roots anchor firmly.
Species Sensitivity
-
Large growers (A. macrorrhizos, A. odora): adapt quickly and thrive in semi-hydro.
-
Jewel species (A. reginula, A. cuprea, A. nebula): more delicate; perform best in mineral mixes like pon with stable warmth and humidity.
-
Small-corm species: slower to stabilise; monitor closely for dehydration or nutrient fluctuation.
Common Pitfalls
-
Overfilled reservoirs → rapid corm rot
-
Hard tap water without monitoring → mineral burn
-
Using soil fertiliser → missing micronutrients
-
Expecting instant success → old roots die first; patience is essential
Myth Check – Semi-Hydro Misconceptions
✖ “Semi-hydro prevents rot completely.” → False. Standing water or poor airflow can still cause rot faster than soil.
✖ “Any fertiliser works in LECA.” → False. Only hydro nutrients supply the full mineral spectrum.
✖ “Roots switch easily from soil to LECA.” → False. Most must be replaced by new hydro roots.
✖ “Semi-hydro is low-maintenance.” → False. It demands regular monitoring of water level, pH, and EC.
📌 Summary
Semi-hydroponics can provide Alocasia with stable moisture and airflow, minimising rot risks and simplifying watering once established. Success relies on timing the transition during active growth, keeping the corm dry, and managing pH, EC, and nutrient balance precisely. With patience and clean routines, most Alocasia adapt beautifully to inert media.
Leaf Care for Alocasia – Keeping Foliage Clean, Healthy & Functional
Alocasia’s large, glossy leaves aren’t just decorative — they power the entire plant. Clean foliage means stronger photosynthesis, faster growth, and early detection of issues before they spread.
Dust, residue, or mineral deposits act like a dull film, blocking light and reducing the plant’s energy production. Regular leaf care keeps your Alocasia efficient, resilient, and visually striking.
How to Clean Alocasia Leaves Safely
The simplest approach works best — gentle wiping with plain water.
-
Use a damp microfibre cloth or soft sponge to remove dust and residue.
-
For large species like A. macrorrhizos, rinse leaves gently in the shower or with a lukewarm spray.
-
Support each leaf from underneath with your hand to prevent tearing.
-
Wipe away guttation droplets (water beads on tips overnight) to avoid mineral stains and fungal spots.
💡 Tip: Always clean before applying pest sprays — treatments stick better to dust-free surfaces.
Avoid These Cleaning Mistakes
-
✖ Leaf shine products: clog stomata, attract dust, and strip the leaf’s natural wax.
-
✖ Detergents or alcohol wipes: burn delicate tissue — spot-treat pests only.
-
✖ Rough cloths or scrubbing: scratch the cuticle, increasing water loss and disease risk.
Understand how stomata function here → What Are Stomata and Why They Matter
How Often to Clean
Wipe leaves every 2–4 weeks, more often in dusty or urban homes.
After cleaning, let foliage air-dry fully before placing it back in humid spaces (terrariums, cabinets, or near humidifiers).
Wet leaves + high humidity = ideal conditions for fungal spotting.
Inspect for Pests While Cleaning
Leaf care doubles as a health check. While wiping, always:
-
Examine undersides and petiole bases for pests.
-
Watch for stippling, sticky residue, fine webbing, or cottony clumps — early signs of mites, thrips, or mealybugs.
-
Disinfect tools and cloths between plants to avoid spreading infestations.
See detailed guides in our Pest Control Category.
Extra Care Tips
-
Never expose wet leaves to direct sunlight — droplets act as magnifiers and cause scorch.
-
In high humidity setups, combine cleaning with gentle airflow to prevent spotting.
Learn more in Mastering Humidity for Healthier Houseplants -
Not all marks are dirt — if stains don’t wipe off, check for nutrient imbalance or pest damage.
Myth Check – Leaf Cleaning Misconceptions
✖ “Leaf shine makes plants healthier.” → False. It suffocates the leaf surface.
✖ “Misting cleans leaves.” → False. It only shifts dust, not removes it.
✖ “Dust is purely cosmetic.” → False. Even a thin layer cuts light absorption by up to 30 %.
✖ “All spots can be wiped away.” → False. Some come from guttation, nutrient issues, or pests.
📌 Summary
Leaf care for Alocasia is about gentle, consistent cleaning and regular inspection. Skip chemical shine products, protect natural wax layers, and remove guttation to prevent stains. Clean leaves don’t just look better — they breathe better, power stronger growth, and make your plant far easier to monitor for early signs of stress.
Fertilizing Alocasia – How to Feed for Strong, Steady Growth
Alocasia are moderate to heavy feeders when actively growing. Their lush foliage, firm rhizomes, and bold leaf colour all depend on a consistent nutrient supply — but overfeeding is one of the fastest ways to cause root stress. The secret is low concentration, regular timing, and balanced nutrients.
Why Fertilizing Matters
In their rainforest habitat, Alocasia draws nutrition from decomposing leaves and rich organic debris. Indoors, nutrients in potting mixes deplete quickly, so supplemental feeding maintains:
-
Regular leaf and root formation
-
Firm, vigorous rhizomes
-
Improved resistance to stress and pests
Without consistent feeding, growth slows, leaves shrink, and petioles weaken.
Feeding Schedule
-
✔ Active growth (spring–summer or year-round under grow lights): fertilize every 2–4 weeks.
-
✔ Dormant or slowed growth: stop feeding completely.
-
✔ Golden rule: never fertilize a plant that isn’t producing new leaves.
💡 Tip: Always water lightly before applying fertilizer to avoid root burn.
Best Fertilizer Types & Ratios
-
✔ Balanced NPK (10-10-10 or 20-20-20) at ¼–½ strength.
-
✔ Prefer nitrate-based nitrogen to reduce burn risk.
-
✔ Controlled-release pellets last 8–12 weeks and simplify maintenance.
-
✔ Organic options (seaweed extract, fish emulsion) are gentle but may attract fungus gnats if overused.
Foliar sprays can correct micronutrient deficiencies quickly but should supplement, not replace, root feeding.
Explore options in Best Fertilizer for Houseplants
Micronutrients That Matter
-
Calcium & Magnesium (Cal-Mag): vital when using RO or distilled water
-
Iron (Fe) & Manganese (Mn): prevent chlorosis in new growth
-
Zinc & Boron: essential in traces for proper leaf expansion
Recognising Deficiency Symptoms
-
Nitrogen: older leaves yellow first; slow growth
-
Magnesium: interveinal chlorosis on mature leaves
-
Iron: pale new leaves with dark veins
-
Boron: twisted or stunted new growth
Species Sensitivity
-
Large species (A. macrorrhizos, A. odora): tolerate stronger feeding.
-
Jewel species (A. reginula, A. cuprea): highly salt-sensitive — dilute more and flush substrate frequently.
Common Fertilizing Mistakes
✖ Overfeeding → salt buildup, burnt tips, and root stress
✖ Feeding during dormancy → nutrients sit unused and rot roots
✖ Fertilizing dry soil → chemical burn risk
✖ Strong feeding under low light → stretched, weak growth
Safe Feeding Practices
-
✔ Water before fertilizing to moisten roots
-
✔ Flush the mix every 6–8 weeks to remove excess salts
-
✔ In semi-hydro setups, keep EC between 0.8–1.2 mS/cm
-
✔ Match feeding intensity to light and temperature: higher light = higher nutrient need
Learn more about nutrient management in The Ultimate Guide to Fertilizing Houseplants
Growth-Based Adjustments
-
Active growth: continue light, regular feeding while new leaves appear
-
Paused growth: hold all fertilizer until new growth resumes
-
Year-round under grow lights: feed lightly and consistently — avoid feast-and-famine cycles
💡 Key principle: Fertilize according to the plant’s growth signals, not the calendar.
📌 Summary
Alocasia thrives on gentle, steady nutrition during active growth. Use diluted, balanced fertilizers, supply essential micronutrients, and flush regularly to avoid salt stress. Skip feeding during dormancy — overfertilization is more damaging than a mild deficiency.
Watering Alocasia – Getting Moisture Balance Right Indoors
Most Alocasia problems start with watering. These plants need steady moisture but oxygen around their roots. In nature, they grow in loose rainforest soils that stay damp yet never swampy. Indoors, your goal is to copy that rhythm — evenly moist substrate, not wet soil.
Core Rule
Keep the mix consistently moist but never saturated. The rhizome stores water, but standing moisture quickly suffocates roots and causes rot.
When to Water
Check moisture instead of the calendar.
-
Let the top 1–3 cm of mix dry before watering again (about 10–15 % of pot depth).
-
Lift the pot: light = time to water.
-
Confirm with a fingertip, chopstick, or probe — several points, not just the surface.
💡 Tip: Learn your pot’s “dry weight.” It’s the simplest, most accurate cue.
How to Water
-
Top watering is best. Water thoroughly until it drains freely — this flushes salts and keeps the substrate oxygenated.
-
Bottom watering is fine for reviving dry mix, but use it occasionally; it doesn’t flush salts.
-
Self-watering pots can work only if the mix is airy and the reservoir isn’t constantly full.
Drainage & Pot Choice
Always use containers with drainage holes. Skip gravel layers — they trap water rather than release it.
Terracotta dries faster (good for humid rooms or heavy waterers). Plastic and glazed ceramic retain moisture longer and need closer monitoring.
For structure, use chunky, breathable substrate — bark, perlite, coco chips. See our Substrate Guide for composition ratios.
Environment & Watering Rhythm
Watering frequency shifts with environment:
-
Light: bright exposure → faster drying.
-
Temperature: roots active at 22–30 °C; below 18 °C, uptake slows.
-
Humidity: low RH (30–40 %) dries soil quicker.
-
Airflow: gentle movement prevents stagnation and fungal buildup.
📌 Golden rule: your plant sets the schedule — not the calendar.
Seasonal Adjustments
During active growth (warm months or under LEDs), Alocasia drinks more.
In cooler, darker conditions, roots slow down — reduce watering and let the top layer dry a bit more.
Plants under grow lights in winter often keep growing and still need regular moisture.
Water Quality
Hard tap water causes salt stress and brown tips. Use rain, filtered, or distilled water when possible.
Flush the substrate every 6–8 weeks with clean water to remove fertilizer buildup.
💡 Did you know? Droplets on leaf tips at night are guttation, not overwatering — a harmless pressure release.
Recognising Water Stress
-
Too much water: yellowing from the base, soft stems, sour smell.
-
Too little: dry edges, limp leaves, soil pulling from pot sides.
-
Sudden collapse: advanced root rot — trim, treat, repot.
Myth Check
-
“Gravel improves drainage” → ❌ creates a perched water table.
-
“Water every X days” → ❌ frequency depends on light, humidity, and substrate.
-
“Terracotta prevents overwatering” → ❌ not if the mix is compact and airless.
-
“Bottom watering is safest” → ❌ salts build up; flush occasionally from the top.
Quick Pro Tips
✔ Learn pot weight and stick to full soak + drain.
✔ Empty saucers after watering.
✔ Pair watering with stable humidity (see our Humidity Guide).
📌 Summary
Alocasia thrives in evenly moist, airy substrate. Adjust watering to light, season, and pot type rather than a fixed routine. With oxygenated roots and consistent moisture, your plant will keep producing strong, glossy leaves without rot or stress.
Before You Begin – What to Expect from Alocasia
This guide covers the core care principles shared across most Alocasia species and hybrids. Each plant, from towering giants like A. macrorrhizos to compact jewels such as A. reginula, reacts a bit differently to light, warmth, and watering rhythm — but the fundamentals remain the same.
If you’re caring for a specific cultivar, visit the Alocasia Collection in our shop.
Each listing includes verified habitat data, substrate recommendations, and tailored grower tips from our team.
Native Habitat – The Blueprint for Indoor Success
To understand how to keep Alocasia thriving indoors, it helps to picture its natural environment:
-
Origin: Tropical and subtropical Asia, Oceania, and northeastern Australia
-
Habitat: Warm, shaded rainforest floors with diffused light and constant moisture
-
Soil: Rich, porous organic matter — freely draining yet evenly damp
-
Climate rhythm: Stable year-round warmth and humidity around 70–90 %, with gentle seasonal light variation
💡 Did you know? The main cause of indoor decline isn’t poor care — it’s instability. Frequent shifts in light, watering, or temperature trigger stress responses like leaf drop. Recreate the steady rainforest conditions and your Alocasia will stay vigorous.
📌 Takeaway: Consistency wins. Bright but filtered light, stable warmth, and evenly moist, airy substrate will keep your Alocasia unfolding new leaves throughout the year.
Also Worth Reading
-
Houseplant Acclimatization – What It Is, What to Expect, and How to Support It – learn how Alocasia adjusts to new conditions after shipping or repotting and how to make that transition stress-free.
Alocasia — Botanical Profile
Overview
Alocasia is a genus of tropical perennials in the Araceae family, first described by H.W. Schott in Melet. Bot. (1832) and later validated by G. Don.
The name derives from Colocasia with the Greek prefix a- (“without”), distinguishing it from taro relatives. About 90–100 species are currently accepted, alongside many ornamental hybrids prized in cultivation.
Taxonomy at a Glance
-
Order: Alismatales
-
Family: Araceae
-
Tribe: Colocasieae
-
Genus: Alocasia (Schott) G.Don
-
Type species: Alocasia cucullata (Lour.) G.Don
-
Chromosome number: 2n = 28
Natural Range
Native to tropical and subtropical Asia through to northeastern Australia, Alocasia occurs in:
India, Sri Lanka, southern China, mainland Southeast Asia, Indonesia, the Philippines, Borneo, Sulawesi, Papua New Guinea, and Queensland.
Species inhabit humid forest understories, floodplains, and occasionally montane zones up to ~2 000 m.
Diagnostic Traits
-
Life form: Rhizomatous or tuberous perennial herbs
-
Leaf attachment: Petiole joins the blade at the sinus (vs. mid-blade in Colocasia)
-
Leaf size: Typically 20–90 cm long; petioles up to 1 m in robust species
-
Texture & colour: From glossy green to velvety black or metallic silver
-
Adaptation: Leaf orientation adjusts dynamically to shaded light conditions
Inflorescence
Classic aroid structure: a spadix encased by a spathe, often exhibiting protogyny and thermogenesis to attract beetle pollinators. Fruits are red to orange berries containing several seeds.
💡Did You Know?
The genus name Alocasia was coined by Heinrich Wilhelm Schott in 1832 to distinguish these plants from Colocasia, the true taro genus.

💡Did You Know?
Unlike Colocasia, Alocasia petioles attach at the sinus (leaf notch) instead of the leaf center—a key diagnostic feature for botanists.
💡Ever noticed water droplets on your Alocasia’s leaves?
Don’t panic—it’s usually guttation, a natural process. Learn why plants “sweat” at night and what it means for their health in our article: Guttation: When Plants Sweat at Night.
Alocasia Propagation – Proven Methods for Reliable Growth
Alocasia can be propagated in several ways, but not all are practical for home growers. While growing from seed is possible, it demands manual pollination and immediate sowing — too much effort for low success. For most collectors, vegetative propagation through rhizome division, offsets, or cormels is faster, cleaner, and nearly foolproof.
Before You Begin
Propagation succeeds only when the plant has energy to spare and conditions support rooting.
-
Work during active growth — never during dormancy.
-
Sterilise tools to prevent infection.
-
Maintain 22–28 °C warmth and 70–90 % humidity for strong roots.
-
Use a moist but airy substrate; stagnant conditions trigger rot.
💡 Need a refresher on drainage vs oxygen? See our Potting Mix Aeration Guide.
Rhizome Division – Most Reliable Method
Best for large, mature plants with several growth points.
-
Remove the plant and gently loosen the substrate.
-
Identify natural divisions (“eyes”) along the rhizome.
-
Cut sections with a sterile knife, each containing at least one bud.
-
Let wounds dry 12–24 h; dust with fungicide or cinnamon.
-
Replant in airy mix, keeping the medium barely moist until roots form.
Rooting usually takes 3–6 weeks.
⚠ Common mistake: planting fresh cuts directly into soggy soil — always let them callus first.
Offsets (Pups) – Easiest for Beginners
Many hybrids (A. ‘Polly’, A. zebrina) produce offsets naturally.
-
When to separate: once offsets show visible roots — leaf count is secondary.
-
How to pot: detach gently, keep roots intact, and use small pots with loose mix.
-
Aftercare: bright, indirect light; 70 %+ humidity; evenly moist substrate.
💡 Offsets shrivelling? Humidity too low — maintain 24–26 °C and use a dome until stable.
Cormels – For Patient Growers
Cormels are small storage bulbs that can form new plants.
-
Collect cormels during repotting.
-
Place shallowly in moist sphagnum with perlite or in semi-hydro.
-
Keep 24–28 °C and 80–90 % humidity until sprouting.
Sprouting takes 6–10 weeks (sometimes longer).
Semi-hydro setups perform well with EC 0.8–1.0 and pH 5.8–6.2; gentle airflow helps prevent fungus.
💡 If you can’t pot immediately, store firm corms in lightly moist medium for several weeks — they remain viable.
Stem Cuttings – Limited to Tall Species
Works only for tall, node-bearing species like A. macrorrhizos.
Compact types such as A. reginula and A. cuprea lack nodes and won’t root this way.
-
Cut a section with at least one node.
-
Root in moist moss or semi-hydro under 70–90 % humidity.
-
Rooting hormone helps but isn’t essential.
Seeds – Rare and Short-Lived
Seed propagation requires manual pollination and immediate sowing.
Viability drops within days, and germination under 25–28 °C can take months.
Most hobbyists skip it; commercial production relies on tissue culture instead.
Tissue Culture – Professional Technique
Used in laboratories for mass propagation. Requires sterile conditions and specialised equipment — not suitable for home setups.
Aftercare & Recovery
New divisions need time to stabilise.
-
Keep in bright, indirect light with steady humidity.
-
Wait for new roots before adding fertiliser; start with diluted feed.
-
Allow airflow — closed domes without vents promote rot.
-
Expect temporary yellowing as energy shifts from leaves to roots.
-
Watch for fungus gnats or mealybugs targeting stressed tissue (see our Pest Control Guides).
For transition tips, read our Houseplant Acclimatisation Guide.
Myth Check
✖ “Propagation only works in spring.”
→ False: any time the plant is actively growing — even under winter LEDs.
✖ “Offsets need several leaves before separation.”
→ False: root development matters more than leaf count.
✖ “Stem cuttings work for all Alocasia.”
→ False: only node-bearing species can root.
✖ “Corms without leaves are dead.”
→ False: firm corms often sprout weeks later in warmth.
✖ “Seeds store well for months.”
→ False: viability lasts only a few days.
📌 Summary
The most effective propagation methods for Alocasia are rhizome division, offsets, and cormels. Each requires warmth, humidity, and sterile technique but rewards you with healthy new plants. Stem cuttings work only on tall species, seed success is rare, and tissue culture remains commercial. With careful airflow and patient aftercare, a single Alocasia can multiply into a thriving collection.
💡 Did You Know?
Some Alocasia species produce dormant cormels that can remain viable for months, only sprouting when conditions become warm and moist.
💡 Did You Know?
Some Alocasia species produce dormant cormels that can remain viable for months, only sprouting when conditions become warm and moist.
Did You Know?
Propagation success rates can increase by mimicking rainforest conditions — consistent warmth, high humidity, and gentle airflow to prevent rot.
💡Did You Know?
Seeds from Alocasia have an extremely short viability window — often just a few days—making hand-pollination and immediate sowing essential.
💡Did You Know?
Alocasia flowers are highly specialized: the spadix contains both male and female zones, and blooming is often synchronized with temperature and humidity peaks to optimize pollination.
💡Did You Know?
Alocasia leaves are highly sensitive to rapid humidity changes — even moving the plant from one room to another can trigger stress symptoms like curling or drooping.
💡Did You Know?
Calcium oxalate crystals, which make Alocasia toxic, also serve as a defense against pests, discouraging chewing insects and some herbivores.
💡Did You Know?
Most Alocasia species have a negative water balance at night, meaning they lose more moisture through respiration than they take up, which makes consistent humidity even more critical.
💡 Mushy Stems and Black Roots? You’ve Got Root Rot— Now What?
Root rot can kill fast ➜ learn how to diagnose, treat, and prevent this common plant emergency.
Alocasia Troubleshooting – Quick Fixes for Common Problems
Alocasia rarely hides its issues — it reacts fast to stress. Yellow leaves, crispy edges, or drooping stems all point to an environmental imbalance. The good news: most problems have simple, reversible causes once you know what to check.
Yellowing Leaves
It’s normal for the oldest leaves to fade, but widespread yellowing signals water or soil issues.
-
Likely causes: overwatering, compact substrate, or low light slowing uptake.
-
Fix: Remove plant, trim soft roots, and repot in airy mix (bark + perlite + coco). Water only when the top 10–15 % dries.
-
Prevent: Always use drainage holes and refresh soil every 12–18 months. See our Houseplant Substrate Guide.
Brown or Crispy Edges
Dry air, mineral buildup, or direct sun usually cause edge burn.
-
Fix: Raise humidity to 60–80 %, flush soil every 6–8 weeks, and use filtered or rainwater.
-
Prevent: Keep a hygrometer nearby and fertilise lightly with balanced feed. Learn more in our Fertiliser Guide.
Drooping or Limp Leaves
Sudden collapse stems from three sources — rot, dehydration, or temperature shock.
-
Fix: Inspect roots; cut rot and repot, or rehydrate gradually if soil is bone-dry. Maintain 22–30 °C.
-
Prevent: Empty saucers, avoid cold drafts, and keep away from vents. Details in Temperature for Alocasia.
Curling or Twisted Leaves
New leaves that curl or deform point to inconsistent moisture, humidity swings, or pests.
-
Fix: Maintain 65–80 % humidity, water evenly, and check undersides for thrips or spider mites. Treat with neem oil or insecticidal soap.
-
Prevent: Rotate plants, stabilise humidity, and ensure gentle airflow. See Mastering Humidity.
Stalled Growth or Small Leaves
When light is too low (< 1 000 lux) or roots are cramped, growth slows.
-
Fix: Raise light to 1 500–3 000 lux (LED 5 000–6 500 K, 12–14 h/day), fertilise every 2–4 weeks, and repot if root-bound.
-
Prevent: Keep the root zone above 22 °C and renew soil yearly. More in Dormancy & Growth Cycles.
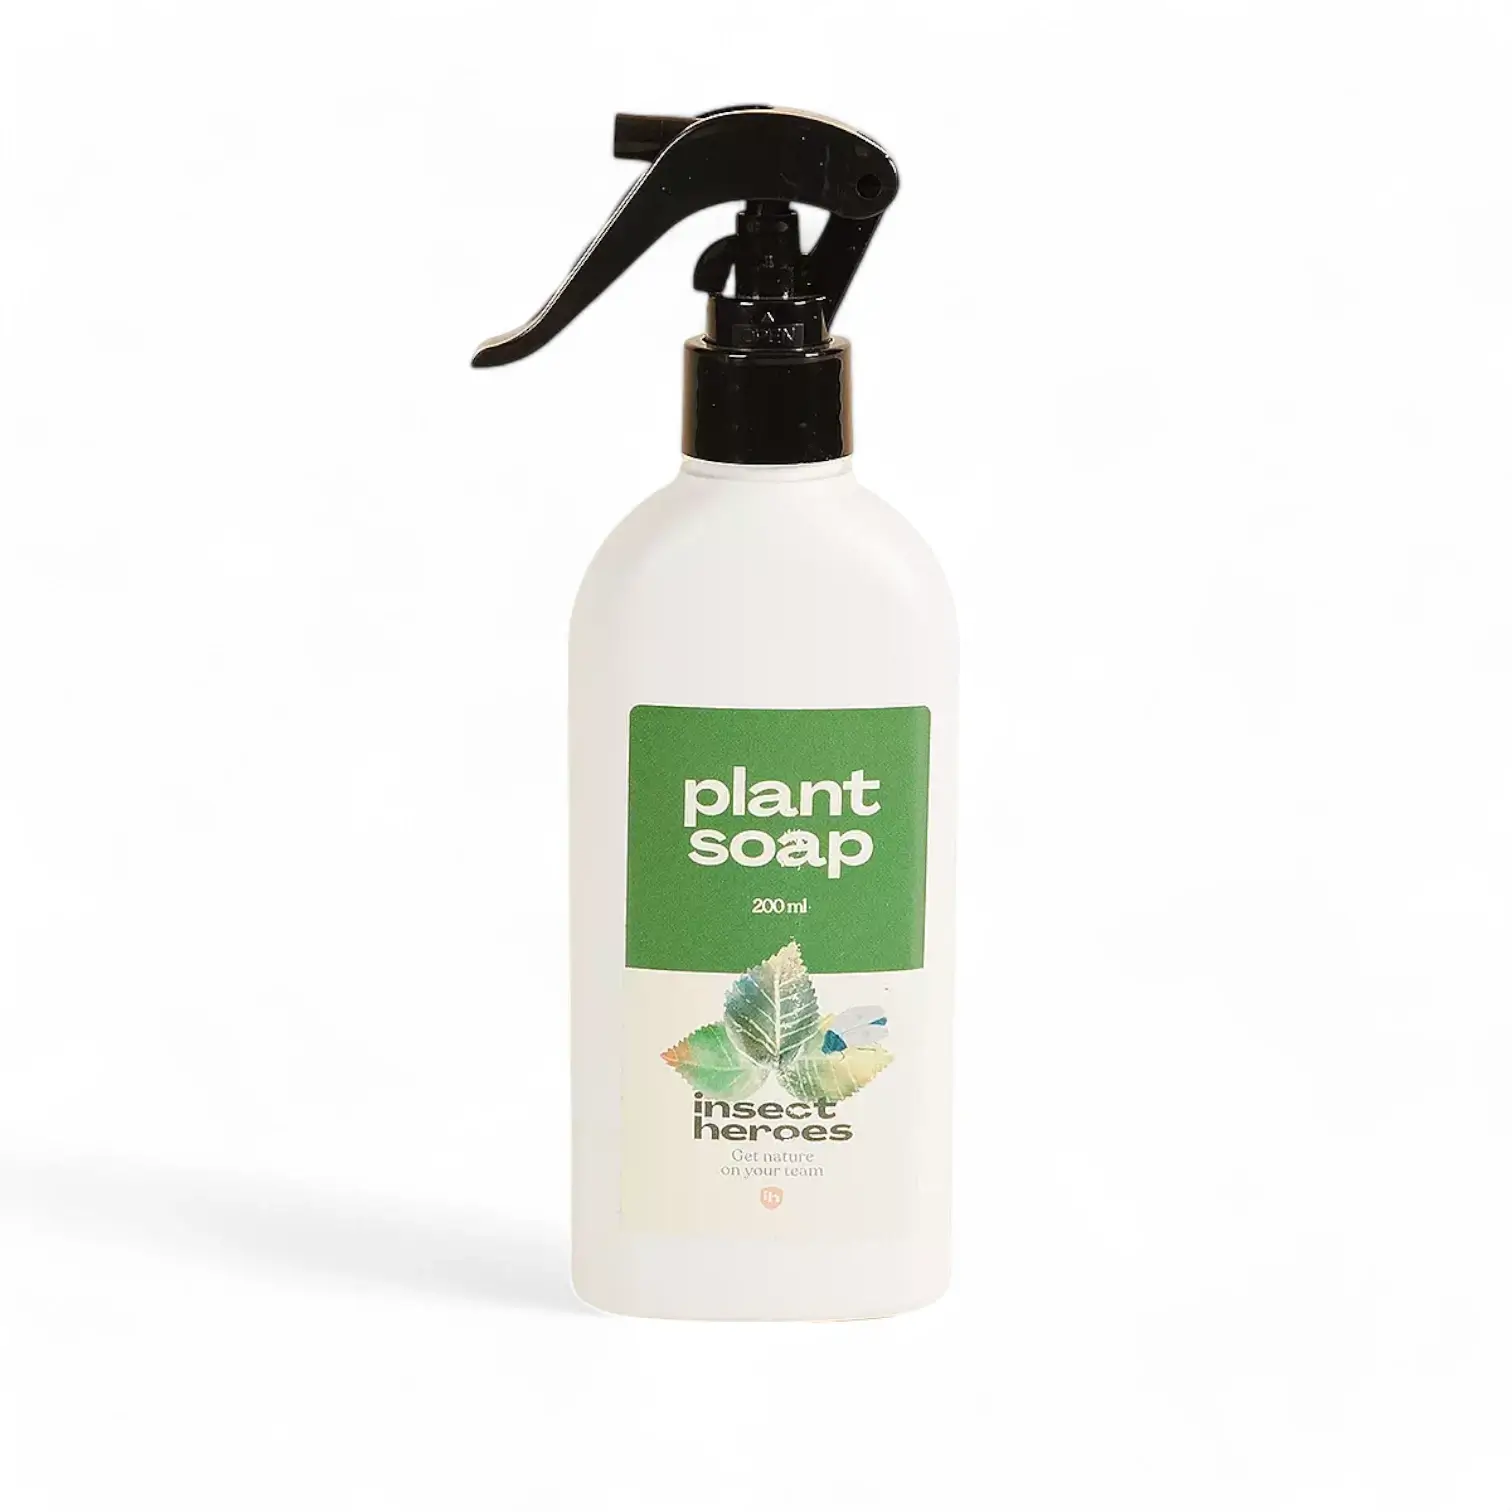
Pests
Spider mites, thrips, and mealybugs are common. Fungus gnats often follow overwatering.
-
Fix: Isolate, wipe leaves with neem or insecticidal soap, repeat every 7–10 days × 3–4 cycles.
-
Prevent: Quarantine new plants, keep substrate airy, and maintain airflow. See Beneficial Insects or Thrips on Houseplants.
Diseases
Root or rhizome rot (Pythium/Phytophthora) and leaf spot appear in soggy, stagnant setups. Viral infections (e.g. Dasheen Mosaic) show yellow mottling — incurable.
-
Fix: Cut affected tissue, repot in fresh mix, sterilise tools.
-
Prevent: Never reuse contaminated soil and keep ventilation steady.
Dormancy or Death?
Leaf loss doesn’t always mean disaster. Dormant corms stay firm; dead ones turn mushy or hollow.
-
Dormancy care: Keep mix barely moist, never dry, and wait for new shoots before full watering.
-
Prevent confusion: cooler temps or low light can trigger dormancy any time of year.
More in Dormancy Care Guide.
Common Mistakes:
❌ Leaving Alocasia in dark corners
❌ Allowing roots to sit in stagnant water
❌ Ignoring early pest signs
❌ Assuming leaf drop = death
Myth Check
✖ “Yellow leaves always mean overwatering.” → Natural aging or low light can do the same.
✖ “Crispy edges = fertiliser burn.” → Often humidity or sun scorch.
✖ “Drooping = death.” → Usually recoverable once roots stabilise.
✖ “Dormancy only in winter.” → Can occur after shipping or stress.
✖ “Spider mites can’t live in humidity.” → They still thrive if airflow is poor.
📌 Summary
Nearly every Alocasia issue has a fix. Yellowing, crisping, drooping, or slow growth all trace back to light, water, humidity, or temperature balance. Always inspect the roots first — a firm rhizome means recovery is likely.
💡Did You Know?
Stress signals like yellowing or drooping can appear within 48 hours of root damage, making quick action crucial after repotting or division.
Cultural & Economic Significance of Alocasia – From Tradition to Trend
The story of Alocasia stretches from survival food to collector obsession. Once valued in Asian and Pacific cultures for its resilience and symbolism, it now defines luxury and modern plant design. Few genera bridge cultural heritage and contemporary style as clearly as Alocasia.
Historical and Cultural Roots
The giant Alocasia macrorrhizos has long supported communities across Southeast Asia, Papua New Guinea, and the Pacific Islands. Austronesian voyagers carried it during migrations as an emergency food source — a famine plant, not a staple.
Its corms contain irritant compounds, so people detoxified them through boiling, fermentation, or soaking to make them barely edible in crisis times. Unlike true taro (Colocasia esculenta), Alocasia never became a daily crop because of this toxicity.
Traditional medicine also found cautious uses: poultices from leaves or stems treated joint pain or skin conditions, though always with risk. Beyond utility, Alocasia gained symbolic value — representing strength, vitality, and abundance. Its broad leaves, used in rituals and ceremonies, often stood for shelter, fertility, and prosperity.
Modern Economic Impact
In the modern plant world, Alocasia has transformed into a collector status symbol. Rare species like A. reginula, A. cuprea, or variegated cultivars such as Alocasia ‘Frydek’ Variegata now dominate the premium indoor-plant market. Prices for uncommon forms can reach hundreds or even thousands of euros, driving an active online resale economy.
This surge has fuelled investment in tissue culture propagation, which improves availability and reduces pressure on wild populations. However, species such as A. micholitziana remain vulnerable to habitat loss in the Philippines, and unsustainable sourcing still threatens local ecosystems.
The balance between collector enthusiasm and conservation ethics defines Alocasia’s next chapter.
💡 Did you know? Many “rare” Alocasia on the market are now lab-propagated in Europe and Asia — not wild-collected — helping protect natural populations while meeting demand.
Design & Social Influence
In interior design, Alocasia delivers instant drama. The towering leaves of A. macrorrhizos and the metallic sheen of A. nebula or A. cuprea act as living sculptures, perfect for minimalist or tropical interiors. Its bold structure conveys luxury, balance, and botanical sophistication.
On social media, Alocasia has become a symbol of plant luxury. Viral photos of rare hybrids or variegated cultivars fuel trends and create global demand. What started as collector fascination has evolved into a cultural phenomenon — Alocasia now sits at the intersection of design, aspiration, and sustainability.
Myth Check – Culture & Market
✖ “Alocasia was a staple crop in Asia.”
→ False. It served only as a famine backup; true taro (Colocasia esculenta) was the staple.
✖ “Rare Alocasia are mostly wild-collected.”
→ False. Most modern supply comes from tissue culture nurseries and commercial growers.
✖ “Alocasia popularity is just a social media fad.”
→ False. Its deep cultural roots and timeless aesthetic ensure long-term appeal.
✖ “All Alocasia have equal value.”
→ False. Rarity, variegation, and growth rate define market price and demand.
📌 Summary
From a detoxified famine food to a modern design icon, Alocasia mirrors human adaptability and aesthetic evolution. It carries cultural weight in Asia and Oceania, economic significance in the global plant trade, and symbolic presence in modern interiors. Its ongoing legacy depends on balancing collector demand with sustainable propagation and ethical sourcing.
💡Did You Know?
In some Pacific Island communities, Alocasia corms were once considered a famine food, only eaten after complex detox processes like long boiling or fermentation.
💡Did You Know?
Tissue culture propagation not only made rare Alocasias more available but also helped reduce pressure on wild populations, supporting plant conservation efforts.
FAQs About Alocasia – Expert Answers to Common Questions
Alocasia is adored for its sculptural foliage yet often surprises growers with sudden changes in growth or leaf health. These answers cover the most common concerns, with direct fixes and myth-free insights.
1. Why is my Alocasia dropping its leaves?
Usually, this is dormancy, triggered by low light or cooler temperatures. The rhizome stays alive underground — reduce watering, keep the mix slightly moist, and wait for new shoots.
Leaf drop can also follow shipping or repotting stress; as long as the corm feels firm, recovery is likely.
Read: Dormancy in Houseplants – The Complete Guide
2. Can Alocasia live in low light?
No. Indoor “shade” is far darker than rainforest light. Alocasia needs bright, indirect light (1 500–3 000 lux). Without it, leaves yellow and growth stops.
See: Understanding Window Orientations & Plant Selection
3. Should I use a grow light in winter?
Yes. Use full-spectrum LEDs (5 000–6 500 K) for 12–14 hours daily to prevent dormancy and maintain leaf production.
Read: The Fascinating World of Plant Lights
4. How often should I water Alocasia?
Water when the top 2–3 cm of substrate is slightly dry. Keep evenly moist but never waterlogged, and always empty saucers.
Guide: The Ultimate Guide to Houseplant Substrates
5. Does misting raise humidity?
Not in a lasting way. Misting adds surface moisture for minutes and can promote fungal spotting. Use a humidifier for reliable humidity.
Learn more: Mastering Humidity for Healthier Houseplants
6. Can Alocasia stay healthy without a humidifier?
Possible, but challenging. Group plants, place them in bright bathrooms or display cabinets; pebble trays or bowls of water offer minimal improvement.
See also: Brown Leaf Tips on Houseplants
7. Is Alocasia toxic?
Yes. All parts contain calcium oxalate crystals that irritate the mouth and skin if ingested. Keep away from pets and children.
For safe alternatives: Houseplants Safe for Cats
8. Why is my oldest leaf dying?
Normal leaf turnover. If several leaves yellow at once, check watering, nutrients, and light.
See: Why Is My Plant Losing Leaves?
9. Why are new leaves smaller or pale?
Likely insufficient light, nutrient deficiency, or compact roots.
Fix: increase light, feed with balanced NPK + micros, and repot if needed.
Guide: Best Fertilizer for Houseplants
10. Can Alocasia grow in water or semi-hydro?
Yes. Many adapt to LECA or mineral substrates if:
-
Nutrients EC 0.8–1.2 | pH 5.8–6.2
-
Keep corm above water line
-
Flush monthly to prevent salt buildup
Start here: From Soil to Semi-Hydro – Transition Guide
11. What’s the easiest way to propagate Alocasia?
Rhizome division works best; offsets (pups) and cormels root easily during active growth.
Learn: Propagating Houseplants
12. Why do some Alocasia go dormant while others stay green?
It depends on species and environment. Large types (A. macrorrhizos) stay evergreen in stable warmth; jewel species (A. reginula, A. nebula) shed leaves when light drops.
More: Alocasia Plants as Houseplants
13. Do Alocasia clean indoor air?
No — the “air-purifying plant” myth persists, but measurable impact is negligible.
Evidence: Do Houseplants Purify Air?
14. Can Alocasia live outdoors?
Yes, in USDA zones 10–12 under filtered light. In cooler climates, bring indoors before temps drop below 15 °C.
See: Winter Care for Tropical Houseplants
15. Do Alocasia flower indoors?
Sometimes. Flowers are subtle aroid spathes and spadices; foliage remains the main attraction.
Related read: Aroids – The Fabulous Arum Family
16. How long do Alocasia live?
With good care, decades. The rhizome continuously renews growth even as leaves cycle.
17. What’s the difference between Alocasia and Colocasia?
-
Attachment: Alocasia petiole joins at the sinus; Colocasia attaches centrally.
-
Habitat: Colocasia tolerates saturated soils; Alocasia prefers moist but drained mixes.
Myth Check – Alocasia FAQs
✖ “All leaves dropping means death.” → A firm corm usually regrows when conditions improve.
✖ “More water makes bigger leaves.” → Excess moisture suffocates roots.
✖ “Alocasia are short-lived novelty plants.” → They can thrive for decades.
✖ “All Alocasia go dormant in winter.” → Many stay active under lights.
✖ “Dust is harmless.” → Dust blocks light and dulls leaf sheen; wipe regularly.
📌 Summary
Most Alocasia questions come down to consistency: bright, indirect light, even moisture in airy substrate, 60–80 % humidity, and stable warmth.
Clean leaves, monitor roots, and your Alocasia will keep its bold form for years.
Sources & further reading on Alocasia plants:
We've gathered a comprehensive list of reliable sources covering everything about Alocasia plants. From botanical classification and cultural significance to their ecological roles, medicinal uses, conservation efforts, and modern horticultural trends—this collection provides valuable insights from academic, scientific, and expert resources.
-
World Checklist and Bibliography of Araceae (and Acoraceae)
Authors: Govaerts, R., & Frodin, D.G. (2002)
Published by: Royal Botanic Gardens, Kew
An exhaustive checklist and bibliography covering all known species within the Araceae family, including Alocasia.
Link
-
The Überlist of Araceae: Totals for Published and Estimated Number of Species in Aroid Genera
Authors: Boyce, P. C., & Croat, T. B. (2011 onwards)
A running list of published and estimated species in the Araceae family.
Link (Aroid.org PDF) | ResearchGate
-
The Genus Alocasia (Araceae—Colocasieae) in the Philippines
Author: Hay, A. (1999)
Journal: Gardens’ Bulletin Singapore, 51(1), 1–41.
Provides an overview of the Alocasia genus in the Philippines, including species descriptions and distribution.
Link (ResearchGate)
-
Giant taro and its relatives: A phylogeny of the large genus Alocasia (Araceae) sheds light on Miocene floristic exchange in the Malesian region
Authors: Nauheimer, L., Boyce, P. C., & Renner, S. S. (2012)
Journal: Molecular Phylogenetics and Evolution, 63(1), 43–51.
This study reconstructs the evolutionary history of Alocasia, confirming its monophyly and highlighting its divergence from Colocasia gigantea ~24 million years ago. It emphasizes the role of Borneo as a dispersal hub for Alocasia during the Miocene.
DOI: 10.1016/j.ympev.2011.12.011
-
Micropropagation of Ornamental Alocasia
Authors: Nguyen Thi Phuong Thao, & Miyajima, I. (2003)
Journal: Journal of the Faculty of Agriculture Kyushu University, 47(2), 277–282.
Discusses methods for micropropagation of ornamental Alocasia species.
DOI: 10.5109/4496
Link (ResearchGate)
-
A Review of Alocasia (Araceae: Colocasieae) for Thailand, Including a Novel Species and New Species Records from South-West Thailand
Author: Boyce, P. C. (2008)
Journal: Thai Forest Bulletin (Botany), 36, 1–17.
Taxonomic overview, new species descriptions, and distribution records of Alocasia in Thailand.
Link (PDF)
-
The Medicinal Properties of the Alocasia Genus: A Systematic Review
Author: Ongpoy, R. C. (2017)
Journal: Journal of Asian Association of Schools of Pharmacy, 6, 25–33.
This systematic review evaluates existing medicinal studies on the Alocasia genus, highlighting research on antioxidant, antitumor, cytotoxic, antimicrobial, and glycemic properties. The findings suggest potential for further studies, particularly in cancer research.
Link (ResearchGate)
-
Traditional Uses, Phytochemistry and Biological Activities of Alocasia Species: A Systematic Review
Authors: Arbain, D., Sinaga, L. M. R., Taher, M., Susanti, D., Zakaria, Z. A., & Khotib, J. (2022)
Journal: Frontiers in Pharmacology, 13, 849704.
This systematic review explores the ethnobotanical uses, phytochemistry, and biological activities of Alocasia species, highlighting their medicinal potential, including antimicrobial, anti-inflammatory, and cytotoxic properties.
DOI: 10.3389/fphar.2022.849704
-
Elephant Ears (Colocasia, Alocasia, and Xanthosoma)
Source: University of Wisconsin-Madison Division of Extension
Discusses the characteristics, cultivation, and care of Alocasia and related plants.
Link
-
Aroids: Plants of the Arum Family
Author: Bown, Deni (2000)
Publisher: Timber Press
An authoritative book covering aroids, including Alocasia, with insights into their biology and cultivation.
Link (Archive.org)
-
Plants of the World Online
Managed by: Royal Botanic Gardens, Kew
Taxonomic information, global distribution data, and identification keys for Alocasia species.
Link
-
Tropicos
Managed by: Missouri Botanical Garden
Offers extensive botanical information, including nomenclature and specimen data for Alocasia species.
Link
-
International Aroid Society – Aroideana
A specialized journal focusing on aroid plants, including Alocasia, featuring research articles, species descriptions, and cultivation tips.
Link
-
Aroid Pictures – Alocasia
A visual database dedicated to Alocasia species, providing high-quality images, species descriptions, and taxonomy for identification and reference.
Link
-
PhytoImages – Alocasia Genus
An image-based plant database featuring taxonomic details, high-resolution photos, and classification data for Alocasia species.
Link: PhytoImages – Alocasia Genus
-
Philippine Alocasia Resource Center
Summary: A specialized resource dedicated to Alocasia species found in the Philippines, offering taxonomic details, ecological data, and cultivation information.
Link
-
Royal Horticultural Society (RHS) – RHS Plant Finder
Summary: A comprehensive database offering authoritative horticultural resources, plant care advice, and cultivation recommendations for Alocasia and other houseplants.
Link
-
Aroidpedia
A comprehensive online resource focusing on aroids, including Alocasia, providing species profiles, care guides, and taxonomy.
Link
-
Aroidpedia – AroidGPT
An AI-powered tool designed to generate information and answer questions related to aroids, including Alocasia.
Link
-
Global Biodiversity Information Facility (GBIF)
A global open-access database that provides biodiversity data, including distribution records and taxonomic details for Alocasia species.
Link
-
Kew Science – Plants of the World Online (POWO)
Managed by: Royal Botanic Gardens, Kew
Provides extensive taxonomic information, global distribution data, and identification keys for Alocasia and other plant species.
Link
-
Missouri Botanical Garden – Plant Finder
A well-established horticultural database offering detailed information on houseplant cultivation, pest management, and species characteristics, including Alocasia.
Link
Want to Learn More About Alocasia?
Explore the full collection of Alocasia care articles on our blog — your complete resource for mastering these tropical showpieces. You’ll find detailed guides on watering and moisture balance, lighting and window placement, humidity and environment, and fertilising houseplants.
Learn how to propagate Alocasia successfully, prevent root rot and water stress, and deal with common pests like thrips and aphids.
For species-specific insight, check out our features on Alocasia longiloba and the Dragon Alocasia group — plus many more rare and variegated cultivars.
Everything you need to understand, style, and grow Alocasia with confidence is only a click away in the Foliage Factory Blog.


Explore Our Alocasia Collection
Each Alocasia offers a distinct aesthetic — velvet-leaf jewels, metallic hybrids, or towering tropicals that define a room.
Explore all currently available plants in the Alocasia Collection and find rare, collectible, and easy-care varieties ready for your home.
💡 Tip: Every listing includes a complete care profile covering light, watering, humidity, and troubleshooting so you can grow confidently from day one.